Attributes
This article details the attribute types, attribute options and how to create or edit data model attributes. See Attribute references for the list of attributes each data model has.
What are attributes?
Attributes define the properties and the metadata of each data model in the Brinqa Platform.
To begin working with data model attributes, navigate to Administration ![]() on the upper-right corner and under Data, click Models. Click the data model for which you want to view or edit the attributes and click Attributes.
on the upper-right corner and under Data, click Models. Click the data model for which you want to view or edit the attributes and click Attributes.
The attributes page allows you to create, edit, delete, or order attributes.
Attribute types
The following attribute types are available when creating new attributes or changing the type of existing attributes. The 'Supports Conversion' column indicates whether the attribute type supports source data conversion during consolidation.
Table 2: Attribute types
| Type | Description | Supports Conversion |
|---|---|---|
| Attachments | Supports attaching files to a record. | No |
| Auto Number | Automatically assigns a unique number to each record. | No |
| BQL Predicate | A special attribute type for the SLA and Risk factor data models to ensure proper Brinqa condition language syntax. | Yes |
| Calculated | Performs calculation based on other values or attributes. For additional information, see Calculated attributes. | No |
| Comments | Captures and displays user comments. | No |
| Currency | Displays a number in the currency format. You can configure the length and decimal places. | Yes |
| Data Source | Represents the data source providing the data. | No |
| Date | Displays date in the dd MMM yyyy format. | Yes |
| Date/Time | Displays date and time in the dd MMM yyyy hh:mm aa format. | Yes |
| Displays email addresses with a default of 320 characters. | Yes | |
| HTML | Displays strings with a built-in HTML editor. | Yes |
| Labels | Displays any combination of letters, numbers, or symbols representing a tag. | No |
| Master Detail | Defines a parent-child relationship between datasets where the parent dataset controls certain behaviors of the child dataset. For example, when a parent dataset is deleted, its child datasets are also deleted. | No |
| Multiple Choice | Displays a list of choices where multiple selections are allowed. | Yes |
| Number | Displays a number. You can configure the length and decimal places. | Yes |
| Password | Displays a text field that stores passwords with one-way encryption. One-way encryption stores the password as a secure hash value that cannot be decrypted. | No |
| Percentage | Displays a number representing percentage. You can configure the length and decimal places. | Yes |
| Phone | Displays a text field that provides formatting and validation for telephone numbers. | Yes |
| Reference | Stores a reference to a data model. For example, the Targets attribute of the Vulnerability data model has a reference to the Host data model. | No |
| Single Choice | Displays a list of choices where a single selection is allowed. | Yes |
| Status | Displays a list of choices and default values representing statuses. | Yes |
| Text | Displays any combination of letters, numbers, or symbols. You can set a maximum length. The default is 256 characters. | Yes |
| Text Area | Displays any combination of letters, numbers, or symbols that display on multiple lines. You can set the maximum length and number of visible lines. The default is 500 characters and 3 visible lines. | Yes |
| Time | Displays the time of day. | Yes |
| True False | Provides a true or false selection. | Yes |
| URL | Displays a clickable Uniform Resource Locator (URL). The URL opens in a separate browser window or tab when clicked. The default length is 2048 characters. | Yes |
| Unique Identifier | A special attribute type to enforce uniqueness of the attribute. | No |
While it is possible to add calculated attributes to Source Data Models (SDMs), it is generally not recommended. The primary reason is to keep the raw data from the source unmodified to ensure the integrity of the data. Modifications and calculations should typically be performed at the Unified Data Model (UDM) level, depending on the use case. However, if your specific use case requires calculated attributes at the SDM level, please consult with your Brinqa Support specialists to determine the best approach.
Reference attributes
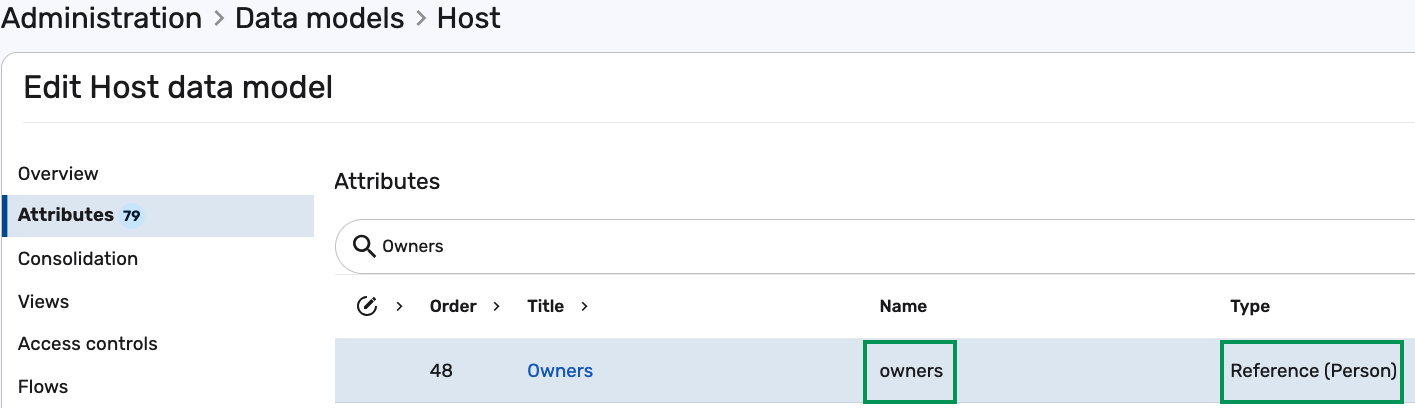
A Reference attribute defines an outgoing relationship from one data model to another, enabling the Brinqa Platform to associate records across data models through shared context—such as linking a Host to its corresponding Person records. These associations are essential for enriching datasets with ownership, location, or other contextual information stored in separate models.
For example, the Owners attribute on the Host data model is a reference to the Person data model. This configuration enables a Host to be associated with one or more Persons through the Owners field:
For a reference to resolve, the target record must already exist in the Brinqa Platform or be included in the same data ingestion batch. You can traverse reference attributes in BQL queries using relationship keywords. See Query for relationships in BQL.
For additional information on how to create a reference attribute, see the reference attribute tutorial.
Calculated attributes
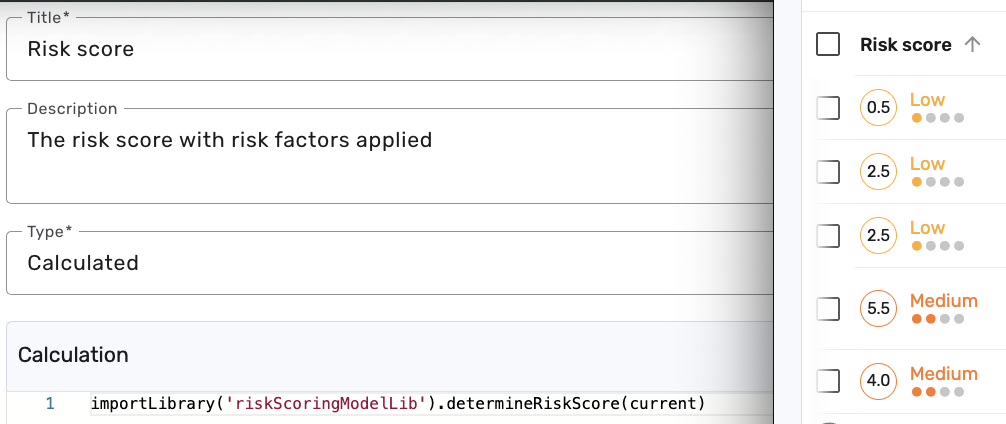
A Calculated attribute computes its value by running a Groovy script instead of storing a value directly. Use calculated attributes to derive a value from other attributes on the same record or from related records.
When you create a calculated attribute, specify the attribute type (such as Text or True False) so that the Brinqa Platform stores, indexes, and displays the computed value correctly. Scripts can range from simple string manipulation to more advanced logic.
For example, the Risk score attribute is a calculated attribute that runs a Groovy script to compute its value from the current record:
For a full explanation of the scripting language, the calculation process, and best practices, see Calculated attributes.
Status and choice attributes
Single Choice, Status, and True False attributes restrict input to a predefined set of options. Each option has an order, a title, and a value. For example, a severity attribute might define the options 0-none, 2-low, 3-medium, 4-high, and 5-critical.
Input must match one of the defined options to pass validation. These attributes are commonly paired with the CHIP or ICON renderer to display color-coded status indicators.
Number, currency, and percentage attributes
Number, Currency, and Percentage attributes store quantitative values such as counts, financial amounts, and risk scores. Values must be valid numbers.
These numeric types support specialized renderers, including NUMBER, PROGRESS_BAR, SPARKLINE, RATING, and STAR_RATING, so you can present the same value as a bar, trend line, or rating.
Attribute options
An attribute's metadata consists of the following options:
Table 3: Attribute options
| Option | Description |
|---|---|
| Active | Marks the attribute as active. Inactive attributes do not lose their values, but they are not shown on views and are not included in calculations. |
| Bulk updating | Indicates where the attribute can be updated in bulk operations. |
| Exportable | Indicates whether the attribute can be exported to a separate data model. |
| Hidden | Marks that the attribute is hidden. Hidden attributes are not displayed in views. |
| Index | Enables full-text searching for this attribute. |
| Read only | Marks the attribute as read only. Users cannot edit read-only attributes. |
| Required | Marks that the attribute is required for the data model. |
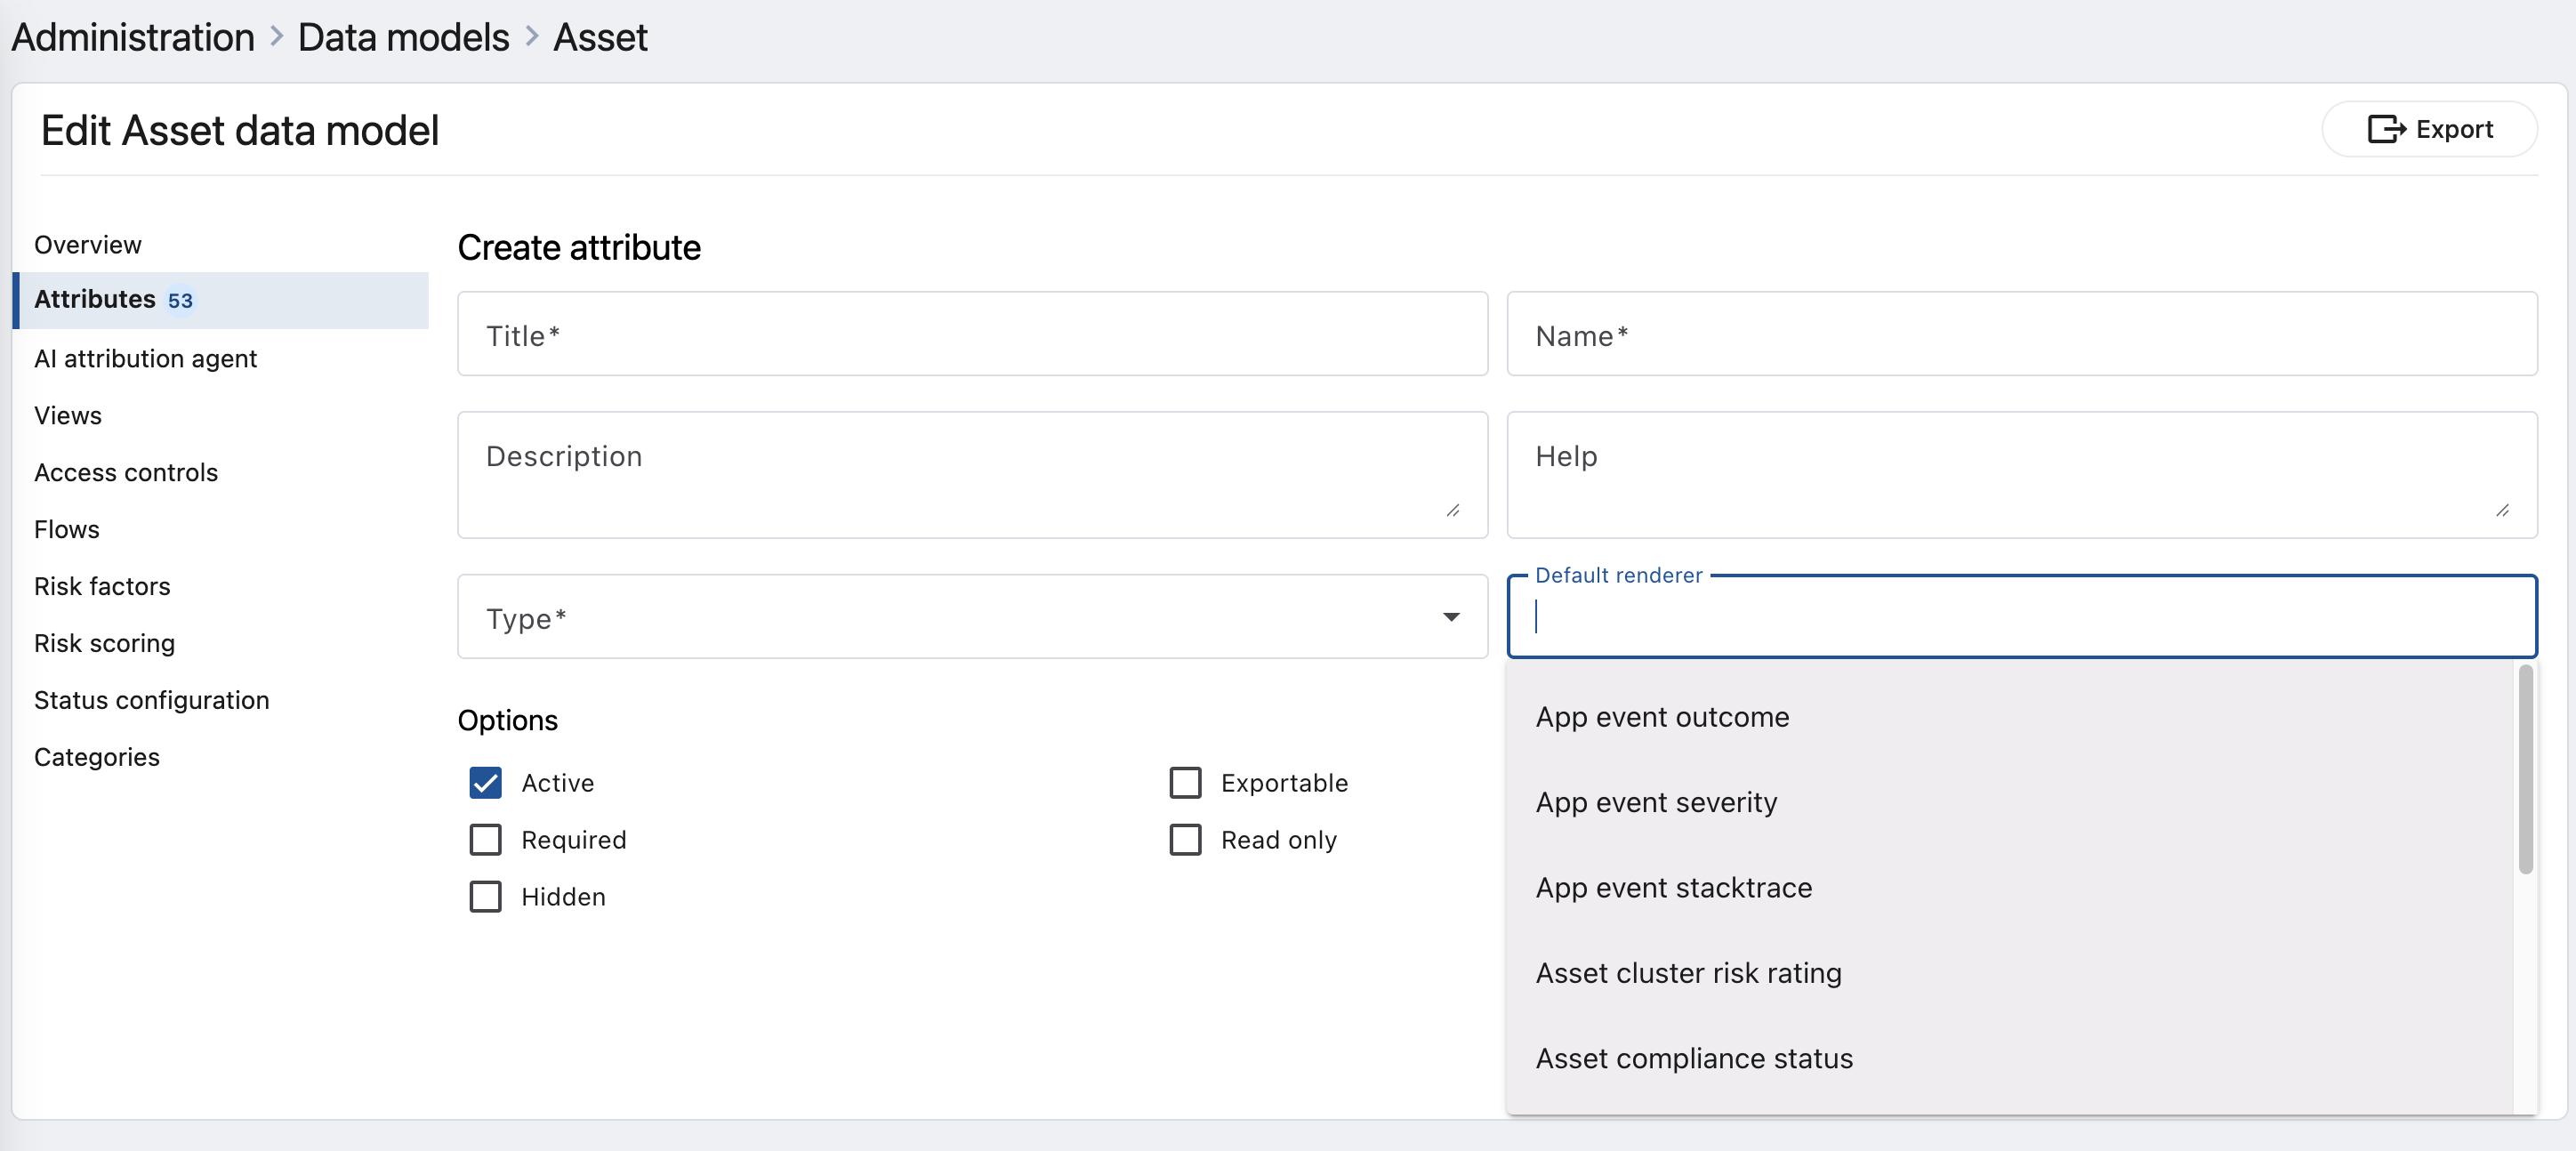
Default renderer
A renderer controls how an attribute's value is displayed on list and show pages. For example, a number can appear as plain text, a progress bar, or a star rating, depending on the renderer you choose. Choosing an appropriate renderer makes data easier to interpret at a glance without changing the stored value.
You set an attribute's renderer using the Default renderer field when you create or edit an attribute.
The renderers available for an attribute depend on its type. The following table lists the renderers you can select for each attribute type.
Table 4: Renderers by attribute type
| Attribute type | Available renderers |
|---|---|
| Auto Number, BQL Predicate, Email, Icon, Labels, Multiple Choice, Phone, Reference, Risk Scoring Model, Status Configuration Model, SLA, Time, Unique Identifier, URL | TEXT, CODE, LINK, EXTERNAL_LINK |
| Number | TEXT, CODE, LINK, EXTERNAL_LINK, NUMBER, CHIP, ICON, PROGRESS_BAR, SPARKLINE, RATING, STAR_RATING |
| Currency, Percentage | TEXT, CODE, LINK, EXTERNAL_LINK, NUMBER, CHIP, ICON, PROGRESS_BAR, SPARKLINE |
| Single Choice, Status, True False | TEXT, CODE, LINK, EXTERNAL_LINK, CHIP, ICON |
| Date | DATE |
| Date/Time | DATE, DATE_TIME |
| HTML | HTML |
| Text | JSON |
| Text Area | JSON, MARKDOWN |
| Risk Factor | RISK_FACTOR |
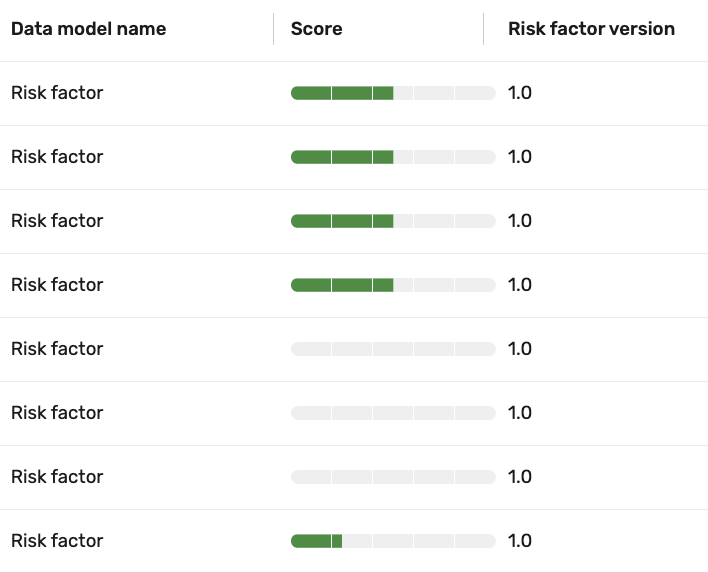
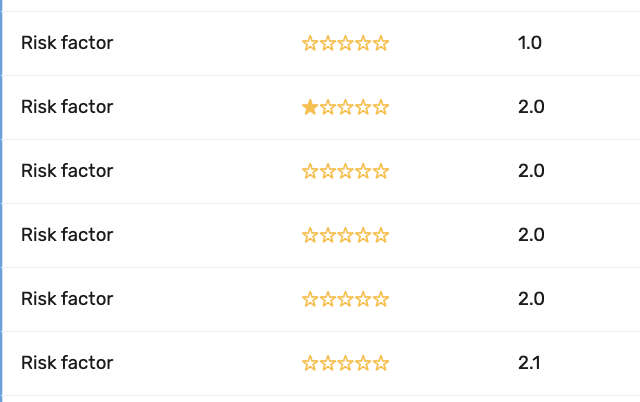
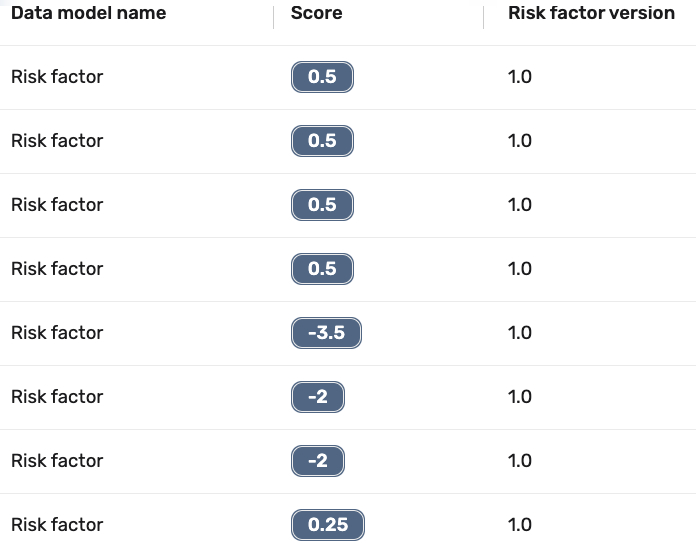
To illustrate the effect of a renderer, the following examples show the same Score number attribute displayed with different renderers.
By default, the value displays as plain text:
With the PROGRESS_BAR renderer, the value displays as a bar:
With the STAR_RATING renderer, the value displays as stars:
With the CHIP renderer, the value displays as a chip:
Default value
The Default value field sets the value an attribute takes when no other value is provided. The Brinqa Platform evaluates this field as a Groovy expression, so it accepts both static values and dynamic expressions, using the same scripting language as calculated attributes.
You can provide:
-
A static value, such as
0for a number orActivefor a status. -
A reference to another attribute on the same record, using
current. For example,current.hostname. -
A value from a related record, using relationship traversal. For example,
current.application?.defaultOwner. -
An expression that combines logic. For example:
return current.hostname?.toLowerCase() + '.local'
Even a simple static value such as Active is evaluated as a Groovy expression, so you can start with plain values and adopt expressions as your requirements grow. For scripting guidance and best practices, see Calculated attributes.
Create a new attribute
Users with the Configurator or System administrator role can create new attributes. To do so, follow these steps:
-
Navigate to Administration
 on the upper-right corner and under Data, click Models.
 -
Locate and click the data model to which you want to add an attribute.
-
Click Attributes on the navigation menu.
-
Click Create.
-
Title: The title of the attribute.
-
Name: The name populates using the attribute's title. The name can only contain alphanumeric characters and must be unique for a given data model. It must begin with a letter and not include spaces, symbols, or underscores.
-
Description: The description of the attribute.
-
Help: The text that appears on the list pages.
-
Type: The type of the attribute. Select an attribute type from the list. See Attribute types for additional information.
-
Default renderer: Determines how the attribute displays on list and show pages. The available renderers depend on the attribute type. See Default renderer for additional information.
-
Default value: The value the attribute takes when no other value is provided. This field accepts a static value or a Groovy expression. See Default value for additional information.
-
Options: The options available for the attribute. See Attribute options for additional information.
-
-
Click Create.
The attributes page reloads and you can drag the newly created attribute up or down on the table to set the order. Attribute order is used when performing calculations.
Edit or delete an attribute
Editing or deleting an attribute can have unintended consequences in the Brinqa Platform, such as loss of historical data, impact on relationships and queries, errors in dashboards, or issues with data integration(s) and orchestration syncing successfully. Before making any modifications, it is strongly recommended to review the changes carefully and consult with your Brinqa Support team.
You can edit or delete existing attributes regardless of whether the data model extends another model. Hold the pointer over the entry and click Edit or Delete to modify an existing attribute.
When a data model extends another data model, the attributes exist on the parent data model, so you cannot edit the attributes in the child data model. You can, however, use the Override option to change the behavior of that attribute for the child.
Tutorial: Create a reference attribute to link Code projects to Code repositories
This tutorial demonstrates how to create a reference attribute on the Code project data model to establish a relationship with its corresponding Code repository. Creating the attribute and defining the relationship type gives the Brinqa Platform the ability to recognize and traverse between the two models.
Users with the Configurator or System administrator role can create new reference attributes. To create this reference attribute, follow these steps:
-
Navigate to Administration
> Data > Models. -
Locate and click the Code project data model.
-
Click Attributes in the navigation menu.
-
Click Create.
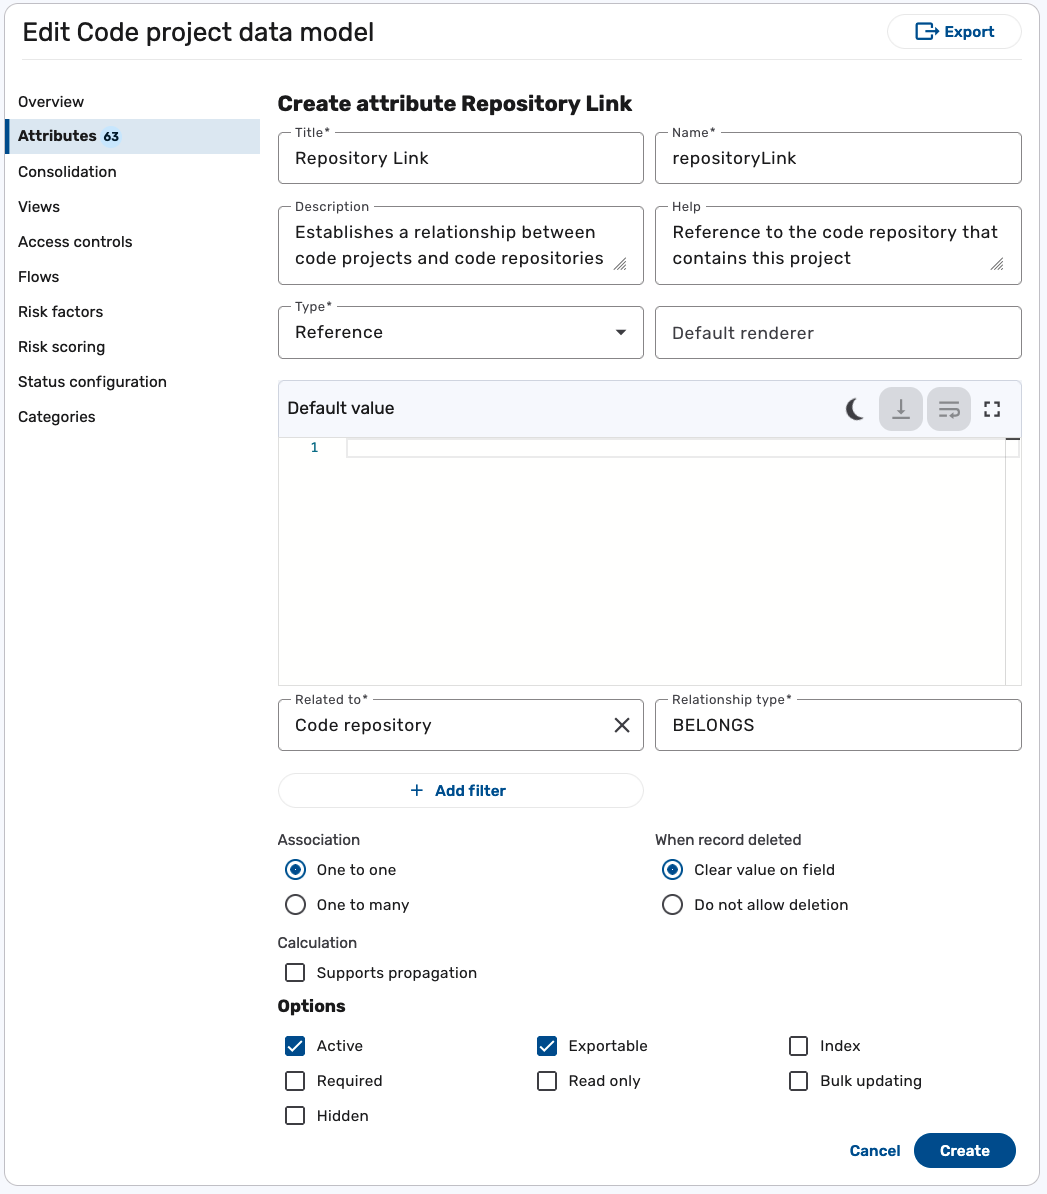
Complete the following fields:
-
Title: Type "Repository Link"
The name field automatically populates using the attribute's title in camel case ("Repository Link" = "repositoryLink").
-
Description: Type "Establishes a relationship between code projects and code repositories".
-
Help: Type "Reference to the code repository that contains this project".
-
Type: Click the dropdown and select Reference.
-
Default renderer: Leave this option as is.
-
-
Under Default value, leave this field blank.
-
In Related to, click the dropdown and select Code repository.
-
In Relationship type, type "BELONGS". This is the BQL relationship keyword that will be used in BQL queries to traverse between the two data models.
You can use
BELONGSorBELONGS TOin the BQL query. Prepositions such asTOcan be used after relationship keywords for fluidity, but they are ignored in terms of query processing. Thus,BELONGSandBELONGS TOare functionally identical.IMPORTANTThe Relationship Type keyword must be in all caps. For example, use
BELONGSinstead ofBelongs. For additional information, see Query for relationships in BQL. -
In Association, select One to one.
This is appropriate because each code project typically belongs to a single code repository. Since we are creating this reference from the Code project model, selecting one to one ensures that each project links to only one repository.
Alternatively, you can select One to many if a code project is associated with multiple repositories. This is less common but valid in cases such as projects that reference multiple upstream repositories. Choose the option that best reflects your data and how you intend to query across the relationship.
-
Under Options, select Active and Exportable.
-
Leave all other unmentioned settings as is and click Create.
The Attributes page reloads, and your new reference attribute is listed. You can now use BQL to traverse the relationship between your code projects and code repositories.
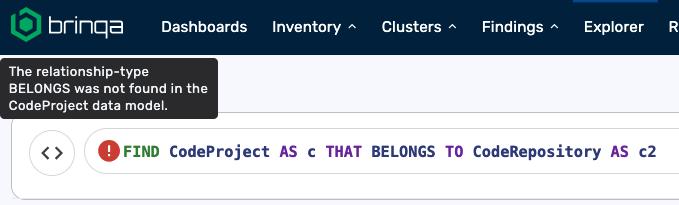
Before we defined the relationship, the following query returned an error:
FIND CodeProject AS c
THAT BELONGS TO CodeRepository AS c2
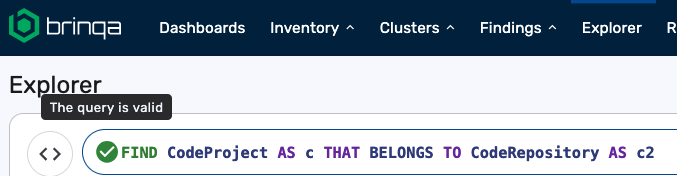
After creating the reference attribute, the same query is now valid and can return data:
Additionally, the relationship is bi-directional. You can query from Code Repository to Code Project using the same BELONGS relationship keyword:
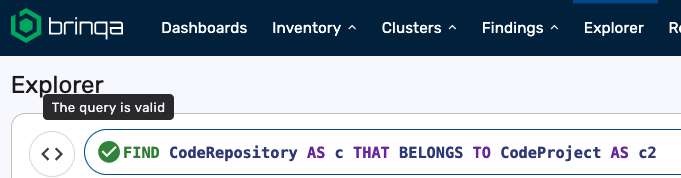
You might notice that the query doesn’t reference the repositoryLink attribute we created for this tutorial. In the Brinqa Platform, BQL uses the relationship type defined by a reference attribute, not the attribute’s name, to determine how to traverse between data models.
Because of this, you should avoid defining multiple reference attributes that use the same relationship type to point to the same data model. If you do, the Brinqa Platform won’t know which attribute to follow when evaluating a query that includes that relationship type. However, you can reuse a relationship type within the same data model if each reference points to a different target model.