Configure Single Sign-On in Microsoft Entra ID
This article describes how to configure single sign-on (SSO) in Microsoft Entra ID (formerly known as Azure Active Directory or Azure AD).
Introduction
Brinqa recommends configuring secure access to your Brinqa Platform, a process that involves two steps:
-
Build an allowlist, a select group of core users' external IP addresses, for local authentication. This helps to ensure that only authorized users can access the Brinqa Platform from trusted devices.
-
Obtain the metadata XML file and send a copy to your Brinqa Customer Success Manager (CSM). The metadata file is necessary to enable SSO authentication in conjunction with Brinqa and ensures that users can access the Brinqa Platform securely.
The remainder of this article illustrates the steps to obtain the metadata XML file in Microsoft Entra ID.
Set up SSO in Microsoft Entra ID
You must enable SSO in Microsoft Entra ID and download the metadata XML file.
Prerequisites
To configure SSO in Microsoft Entra ID, you need the following:
-
An Azure AD user account with an Administrator role.
-
A Microsoft Entra ID P1 or P2 license to assign groups, if you also want to configure just-in-time (JIT) provisioning.
Create an enterprise application
The steps may vary based on the Microsoft portal you are on. Please consult Microsoft documentation for accuracy.
To add a new enterprise application for Brinqa, follow these steps:
-
Log in to your organization's Microsoft portal as an Administrator.
-
Navigate to Enterprise applications > All applications.
-
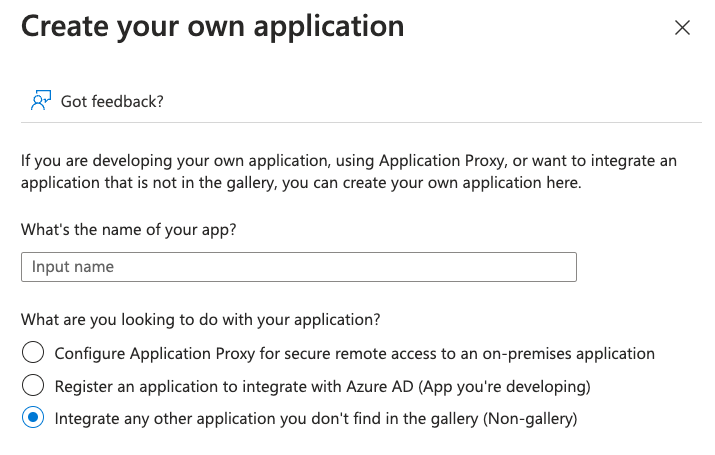
Click Create your own application.
-
Enter a name for the application, e.g.: "Brinqa".
-
Under What are you looking to do in your application?, select the third option, Non-gallery, as shown in the screenshot:
-
Click Create.
Configure SSO in the enterprise application
To enable SSO for the enterprise application you've created for Brinqa, follow these steps:
-
Log in to your organization's Microsoft portal as an Administrator.
-
Navigate to the enterprise application you've created for Brinqa.
-
In the left menu, click Single sign-on, and then click Set up single sign on.
-
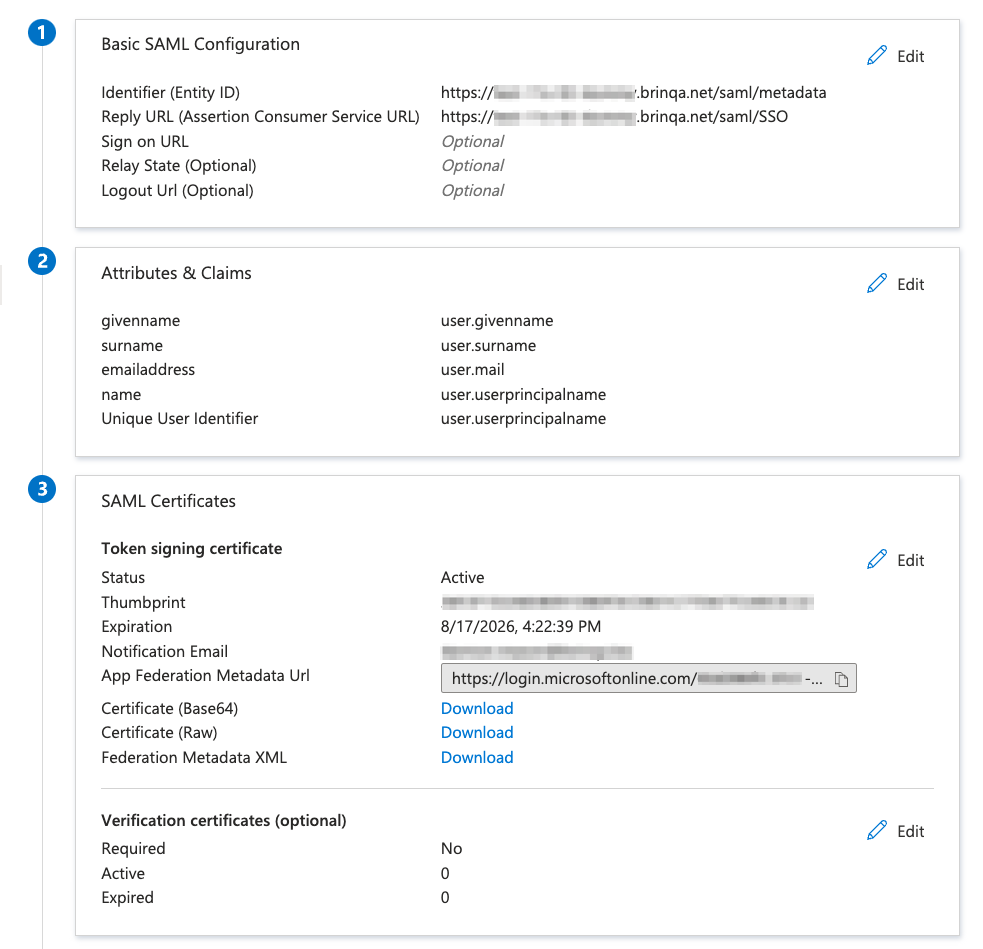
Under Basic SAML Configuration, click Edit to fill in the two required fields: Identifier and Reply URL.
-
Identifier: Enter
https://<YourCompanyName>.brinqa.net/saml/metadata. -
Reply URL: Enter
https://<YourCompanyName>.brinqa.net/saml/SSO.
where
https://<YourCompanyName>.brinqa.netis the URL to your Brinqa Platform. -
-
Under Attributes & Claims, keep the default settings.
-
After saving your changes, the configuration might resemble this screenshot:
-
Under SAML Certificates > Federation Metadata XML, click Download to save the file.
-
Email a copy of the metadata XML file to your Brinqa CSM.
The metadata XML file contains information about your organization's SSO solution, such as SSO endpoints and public keys for signing and encrypting messages. Your Brinqa CSM uses this file to configure the connection between the Brinqa Platform (service provider) and Microsoft Entra ID (identity provider).
-
After the SSO connection has been established, change the login method to SAML in your Brinqa Platform to ensure successful login for all users.
tipBrinqa recommends retaining a System administrator account in the Brinqa authentication method, which is to log in with a username and password, for troubleshooting and verification purposes.