Configure Single Sign-On in Okta
This article describes how to configure single sign-on (SSO) in Okta.
Introduction
Brinqa recommends configuring secure access to your Brinqa Platform, a process that involves two steps:
-
Build an allowlist, a select group of core users' external IP addresses, for local authentication. This helps to ensure that only authorized users can access the Brinqa Platform from trusted devices.
-
Obtain the metadata XML file and send a copy to your Brinqa Customer Success Manager (CSM). The metadata file is necessary to enable SSO authentication in conjunction with Brinqa and ensures that users can access the Brinqa Platform securely.
The remainder of this article illustrates the steps to obtain the metadata XML file in Okta.
Add an Okta SAML application
You must create a Security Assertion Markup Language (SAML) application in Okta and save the Identity Provider metadata XML file.
The steps may vary based on the Okta product you are on. Please consult Okta documentation for accuracy.
To add a new SAML application for Brinqa, follow these steps:
-
Log in to the Okta Admin Console.
-
Navigate to Applications > Applications.
-
Click Create App Integration.
-
Select SAML 2.0 and click Next.
-
Enter a name for the application, e.g.: "Brinqa", and click Next.
-
Under SAML Settings, update the following fields:
-
Single sign-on URL: Enter
https://<YourCompanyName>.brinqa.net/saml/SSO. -
Audience URI (SP Entity ID): Enter
https://<YourCompanyName>.brinqa.net/saml/metadata. -
Name ID format: Select
EmailAddress.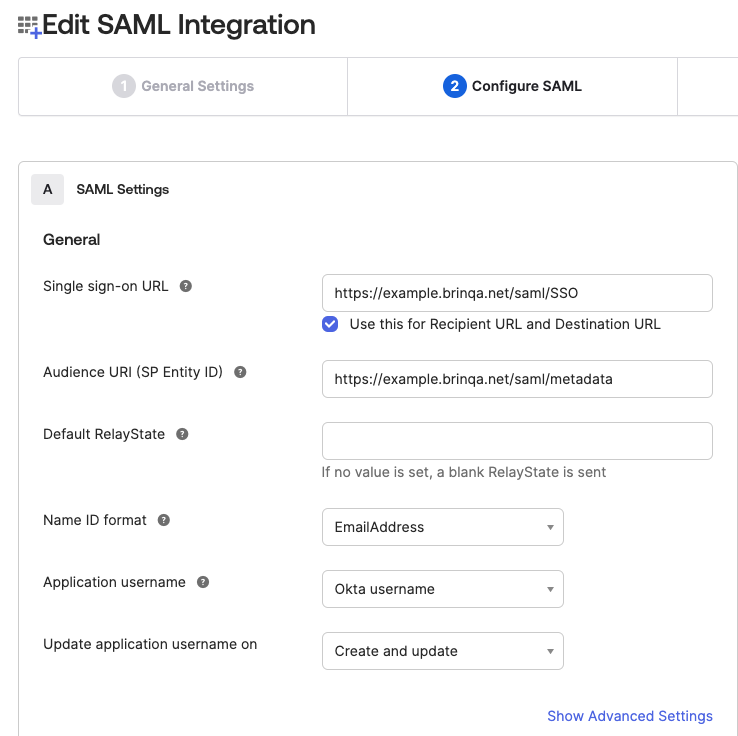
-
-
Click Next and then click Finish on the following screen.
You can change the other settings as needed but they aren't required for the SSO configuration with Brinqa.
-
After the page reloads, click View SAML setup instructions.
-
Locate Provide the following IDP metadata to your SP provider, copy the entire content in the field and save it to a file named
idp.xml.
-
Email a copy of the metadata XML file to your Brinqa CSM.
The metadata XML file contains information about your organization's SSO solution, such as SSO endpoints and public keys for signing and encrypting messages. Your Brinqa CSM uses this file to configure the connection between the Brinqa Platform and Okta.
-
After the SSO connection has been established, change the login method to SAML in your Brinqa Platform to ensure successful login for all users.
Brinqa recommends retaining a System administrator account in the Brinqa authentication method, which is to log in with a username and password, for troubleshooting and verification purposes.