Brinqa User Interface
This article describes the different tabs and menus in your Brinqa Platform, how to edit the list view columns, and how to export and download your list views.
The Brinqa user interface (UI) is the main way to interact with menus and pages in your instance. Since the Brinqa UI is customizable, the exact menus in your Brinqa Platform may vary. See the Navigation Menu Items for reference.
Most of the pages in the Brinqa UI display a list view of your data. You can search through the records to limit what's displayed, and then click each item to view more details. You can also add more filters for the basic search, edit the list view columns to display more or fewer columns, select multiple items at once to perform bulk actions, or export the list view.
Navigation menu items
Your Brinqa Platform contains several pages or modules in the navigation menu. The following table describes the different items you may see in the navigation menu:
| Item | Description |
|---|---|
| Dashboards | Displays the dashboard library, which contains both built-in and custom dashboards in the Brinqa Platform. You can only see dashboards that you have access to. |
| Inventory | Displays a list view of your assets retrieved from data integration. Hold the pointer over Inventory to display and choose from different Inventory categories, including Assets, Apps, Cloud, Network, and Human Resources. |
| Clusters | Displays a container of your clusters. Hold the pointer over Clusters to display and choose from different cluster types, including Assets, Finding Definitions, and Ownership. |
| Findings | Displays a list view of your findings retrieved from data integration and data orchestration. |
| Explore | A global search for all your data and displays results in a graph or list view. You must enter your search using the Brinqa query language (BQL). |
| Remediation | Displays a list view of your remediation efforts. Hold the pointer over Remediation to display and choose from different Remediation categories, including Tickets, Sprints, and Requests. |
| Automation | Displays a list view of your automations. |
| Analytics | Displays a list view of your reports. |
| Integrations | Hold the pointer over Integrations to display and choose from your configured data integrations, access the connector store, or view or create data servers. |
| Notifications | Displays notifications in your instance. |
| Apps | Switch to different apps in your instance. |
| Administration | Access the Administration menu, including user administration, views, data models, risk factors, SLA definitions, and more. |
| Help | Access the Brinqa documentation, contact the Brinqa Service Desk, or raise an issue by sending an email to support@brinqa.com. Click About to find out the build and version number, host IP address, host name, and uptime of your Brinqa Platform. |
| Account | Edit your user information, change your password, view exports, or log out of your account. |
Switch themes
Theme switching was introduced in Brinqa Platform version 11.30. Brinqa strongly recommends upgrading to the latest platform version to take full advantage of the functionality.
You can switch between light and dark mode to customize the appearance of the Brinqa Platform. To do so, follow these steps:
-
Navigate to Account > Theme.
-
Select one of the available options:
-
Dark theme – Enables a dark color scheme for the user interface.
-
Light theme – Enables a light color scheme for the user interface.
-
Match browser – Adjusts the theme based on your browser settings.
The theme applies immediately and is saved between login sessions.
-
Bulk actions
The Brinqa UI supports bulk actions. You can perform certain actions to one or more selections at the same time, as opposed to performing the same action to individual records over and over.
For example, you can navigate to Findings and select one or more of the findings in the list view, and then click the Select an action menu to choose from the available actions to apply to your selected records. Actions include: create an exception request, create a risk acceptance request, or create a false positive request.
Modify list view filters
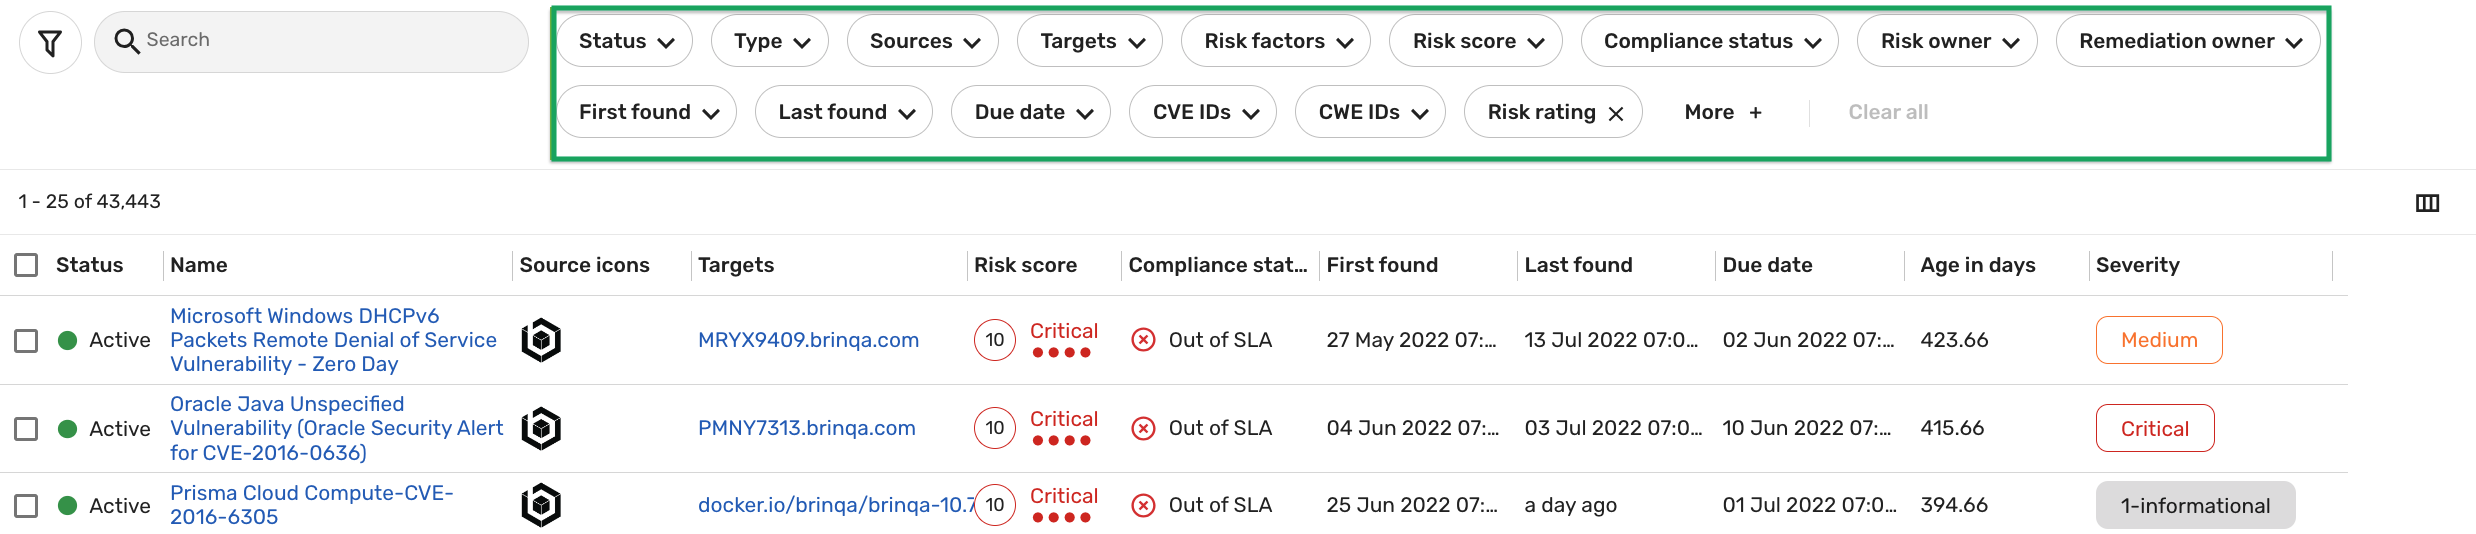
Within the list view, there are default attribute filters designed to help refine your dataset. These filters are displayed next to the search bar. You can add more filters if needed. For example, to add Risk rating to the Findings page, follow these steps:
-
Navigate to the Findings page.
-
Click More next to the default filters.
-
Select Risk rating.
-
Click Apply.
The Risk rating filter is added to the Findings page. If you want to remove some of the default filters, please refer to Modify default filters and columns on the host list view.
Modify list view columns
You can customize what columns are displayed on a list view by clicking the Select columns ![]() menu.
menu.
You can select additional columns or remove some columns. For example, the Findings list view displays a default set of columns. If you want to add a Risk rating column, follow these steps:
-
Navigate to Findings > All findings.
-
Click the Select columns
 menu.
menu. -
Select Risk rating.
-
Click Apply.
The Risk rating column is added to the Findings list view.
You may need to scroll horizontally to the end to see the new column in the list view.
Add comments to records
The Brinqa Platform gives you the ability to add, edit, and delete comments on the following records:
-
Assets and all data models that extend Asset: Account, API endpoint, Application, Assessment, Certification, Code project, Code repository, Container, Container image, Device, Host, Host image, IP range, Network segment, Package, Person, Service, Site, Site certificate, and Subnet.
-
Findings and all data models that extend Finding: Alert, Dynamic code finding, Finding, Incident, Manual finding, Open source finding, Pentest Finding, Static code finding, Violation, and Vulnerability.
-
Requests: Exception requests, False positive requests, Remediation validation requests, and Risk acceptance requests.
-
Tickets: Alert ticket, Dynamic code ticket, Incident ticket, Manual ticket, Open source ticket, Pentest ticket, Static code ticket, Ticket, Violation ticket, and Vulnerability ticket.
-
As well as Remediation campaigns and Security advisories.
Comments can enhance collaboration by letting you share insights and updates directly with other users in the Brinqa Platform.
Add a comment
To add a comment, follow these steps:
-
Navigate to the record that you want to leave a comment on.
-
Click the Comments Tab.
-
In the Add a comment text box, type your comment.
There is no limit to the amount of characters in a comment.
-
Click Comment to save your comment.
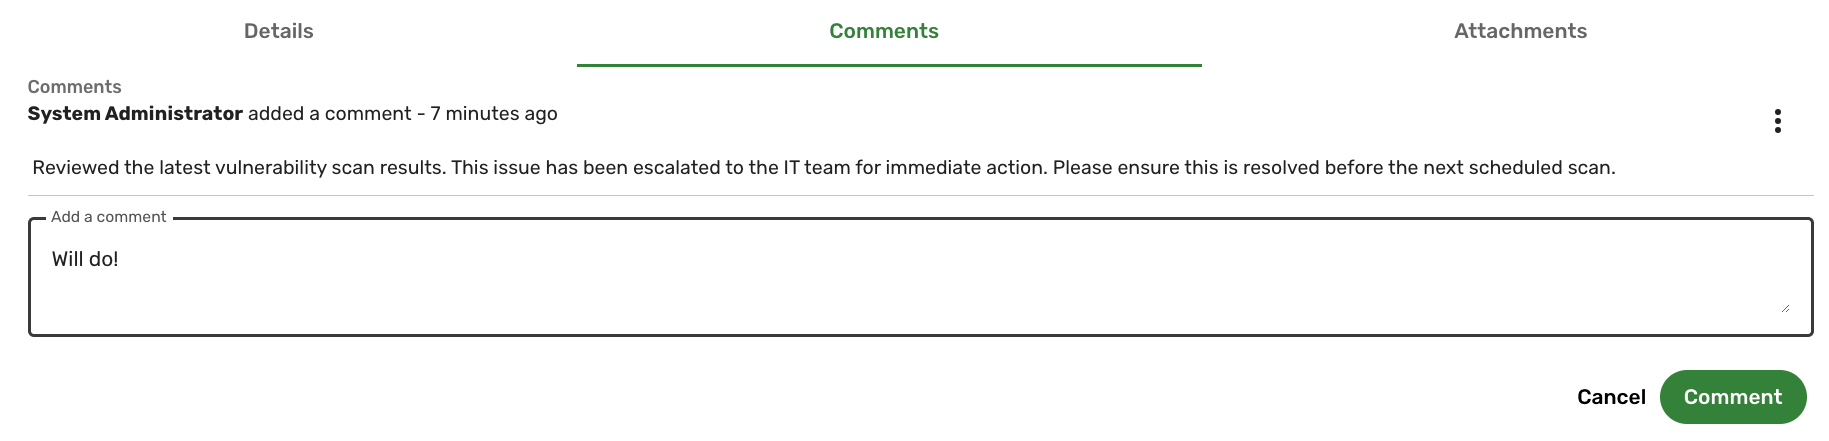
Your comment displays in the Comment tab.
Other Brinqa users with access to that data can see your comments. For example, if you are part of a Risk Owner team and you leave a comment on a finding, other team members with access to that finding can see your comment. The same applies to tickets, remediation requests, and remediation campaigns.
Edit or delete comments
Comments can be edited or deleted after they are posted. To edit a comment, follow these steps:
-
Locate the comment you wish to edit.
-
Click the 3-dot kebab menu next to the comment.
-
Select Edit from the drop-down.
-
Make the necessary changes to your comment.
-
Click Update.
To delete a comment, follow these steps:
-
Locate the comment you wish to delete.
-
Click the 3-dot kebab menu next to the comment.
-
Select Delete from the drop-down.
-
In the Remove comment dialog, click Delete.
Disable comments
If you wish to disable the commenting functionality, follow these steps:
-
Navigate to the data model where you want to disable comments, such as Finding.
-
Click Attributes.
-
Search for and click the Comments attribute.
-
Navigate to the Options section and uncheck the Active option.
When you uncheck the Active option, the Comments tab still displays on that record, but the ability to add new comments is disabled. On the other hand, if you see the Comments tab but cannot add comments, it's because commenting has been disabled for that data model.