Flow Builder
The Flow Builder is a visual canvas for creating and editing automation flows. Each step in a flow appears as a node on the canvas, and transitions between steps appear as connections between nodes.
Use the Flow Builder to browse actions, drag them onto the canvas, configure step properties, and define transitions. A configuration panel on the right side displays settings for the selected step, transition, or flow.
Access the Flow Builder
Users with the Configurator or System Administrator role can access the Flow Builder.
- Go to Administration > Manage Flows > All flows.
- Click Edit on any flow.
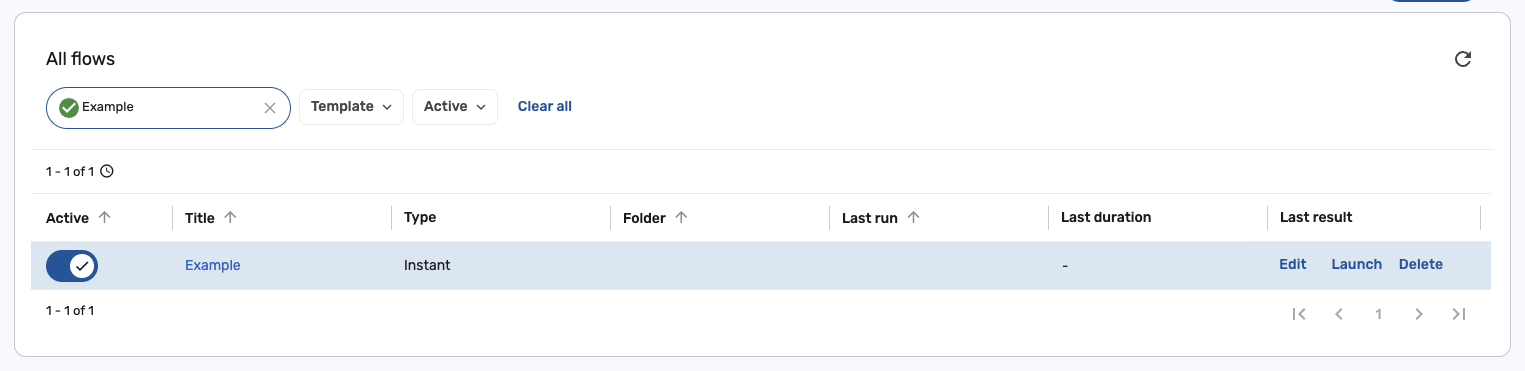
The Flow Builder opens at the URL /{app}/admin/automation/flows/{flow-name}/edit.
Flow Builder layout
The Flow Builder has three areas:
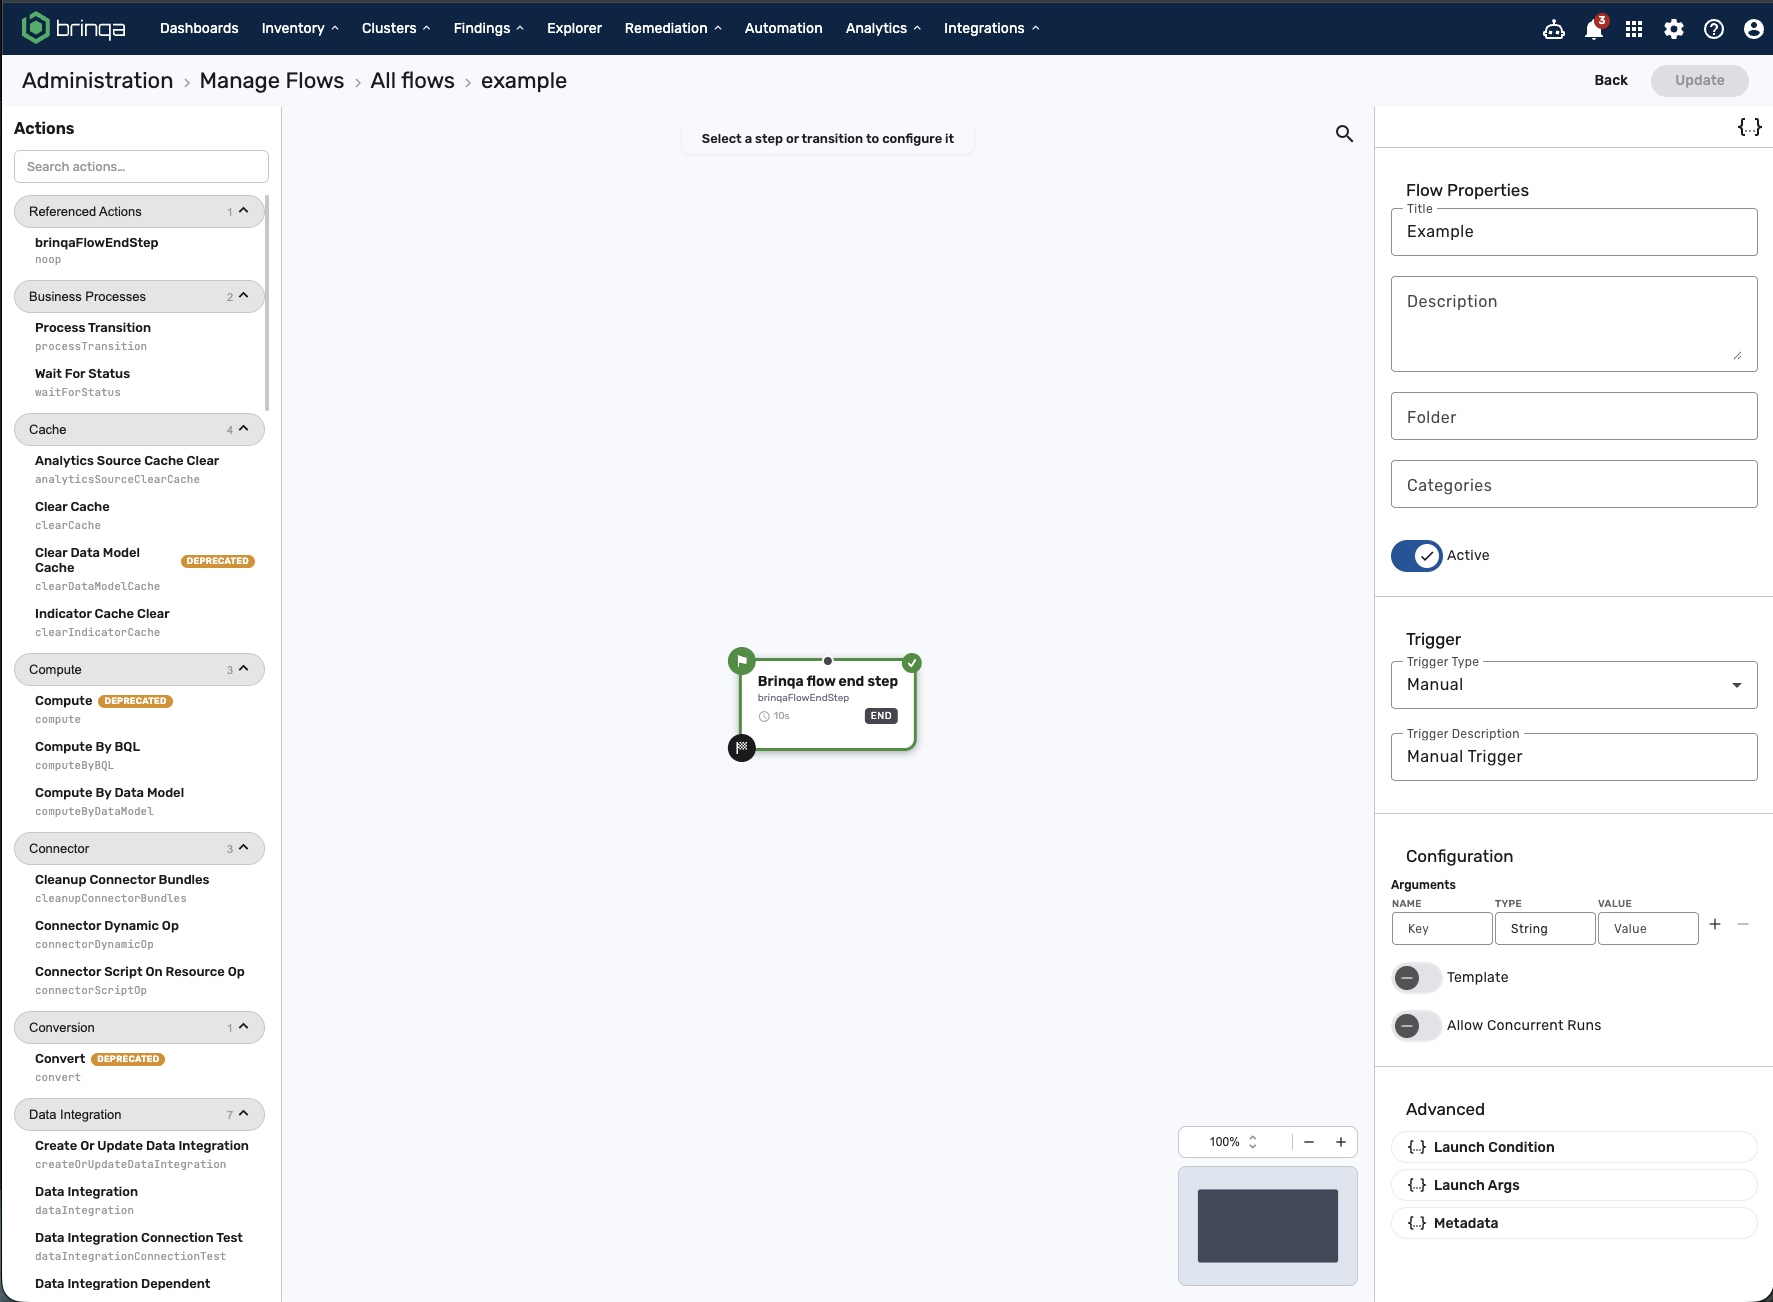
- Actions sidebar (left): A searchable, categorized list of available actions. A Referenced Actions section at the top lists flow-level action definitions. Drag an action onto the canvas or click the insert button to add a step.
- Canvas (center): The workspace where you arrange step nodes and draw transitions. Each node displays its title, action type, timeout, and transition type. The canvas includes zoom controls, a minimap, and a search bar.
- Configuration panel (right): Context-sensitive settings for the selected step, transition, or flow.
Add a step
- In the Actions sidebar, browse or search for an action by name, type, or category.
- Drag the action onto the canvas, or click Insert to place it at the center of the viewport.
The new step node appears on the canvas and the configuration panel opens on the right.
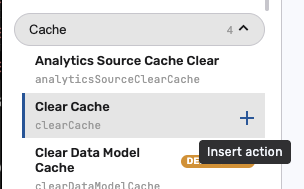
Deprecated actions display a badge in the sidebar. Hold your pointer over the badge to see deprecation details and the recommended alternative.
Configure a step
Select a step node on the canvas to open its properties in the configuration panel. The fields depend on the action type. The following example shows the common fields:
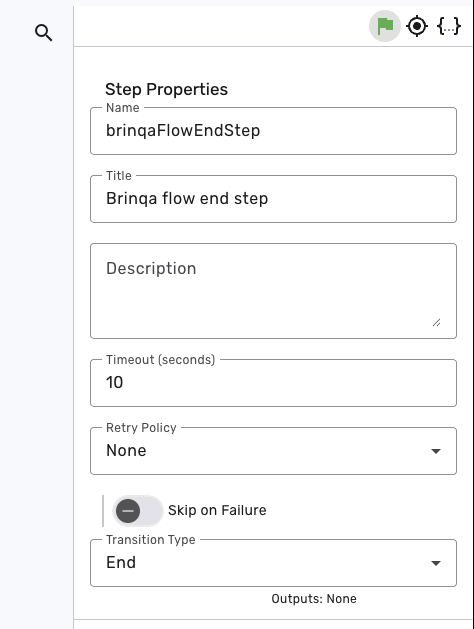
- Name: Internal step identifier.
- Title: Display label shown on the canvas node.
- Description: Optional summary of what the step does.
- Timeout (seconds): Maximum execution time before timeout (default: 10).
- Retry Policy: None, Fixed Interval, or Exponential Backoff. When you select a retry policy, set the retry count and interval.
- Skip on Failure: Toggle on to continue the flow if this step fails.
- Transition Type: Controls the output handles on the node. Options: Static, Dynamic, End, Suspend, Timer, Event, Retry, Loop, and Polling.
Each action type has its own required and optional fields. Required fields are marked in the configuration panel.
The toolbar at the top of the panel provides these actions:
| Icon | Action |
|---|---|
| Flag | Set as the starting step. |
| Crosshairs | Center the canvas on this step. |
Code {.} | Open the JSON editor for this step. |
Connect steps with transitions
- Hover over the output handle on the bottom or side of a step node.
- Drag from the output handle to the input handle of the target step.
- Release to create the transition.
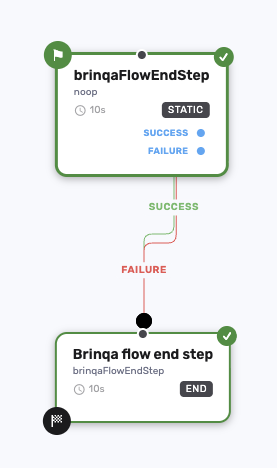
Each node displays labeled output handles based on its transition type. For example, a Static transition type shows SUCCESS and FAILURE handles.
Transitions are color-coded:
| Color | Labels |
|---|---|
| Green | SUCCESS, TRUE |
| Red | FAILURE, FALSE |
| Blue | RESUME |
| Gray | NEXT, DEFAULT |
| Purple | COMPLETE |
Click a transition edge on the canvas to view its details.
The Flow Builder detects self-referencing transitions and circular dependencies in real time and highlights them as validation errors.
Configure flow properties
Click an empty area of the canvas to deselect all nodes and open the Flow properties panel.
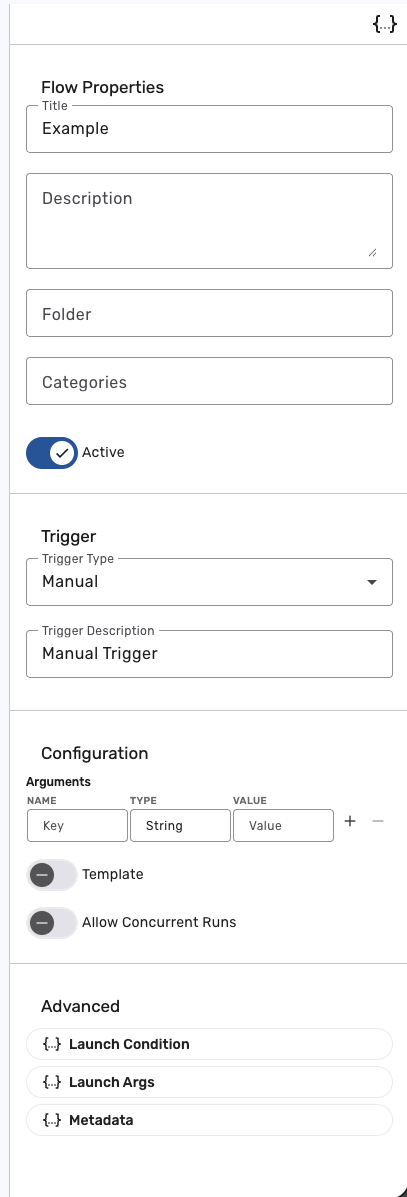
Flow properties
| Field | Description |
|---|---|
| Title | Display name of the flow. |
| Description | Summary of what the flow does. |
| Folder | Organizational folder for the flow. |
| Categories | Tags for categorizing the flow. |
| Active | Enable or disable the flow. |
Trigger
Select a Trigger Type from the dropdown:
| Trigger Type | Behavior |
|---|---|
| Manual | Runs when started by a user or API call. |
| Cron | Runs on a cron schedule. Enter a cron expression. |
| Fixed Interval | Runs at a regular interval. Set the interval and unit (second, minute, hour, day, week, or month). |
| Event | Runs when a specific event type occurs. Select the event type. |
| Webhook | Runs when its auto-generated webhook URL receives a request. |
Each trigger type includes a Trigger Description field for documentation.
Configuration
| Option | Description |
|---|---|
| Arguments | Key-value arguments (Name, Type, Value) passed when the flow launches. Click + to add and - to remove. |
| Template | Mark the flow as a reusable template. |
| Allow Concurrent Runs | Allow multiple instances of this flow to run simultaneously. |
Advanced
- Launch Condition: BQL expression that must evaluate to true before the flow runs.
- Launch Args: Arguments passed automatically when the flow triggers.
- Metadata: Key-value metadata attached to the flow.
Use referenced actions
Referenced actions are action definitions stored at the flow level that you can reuse across multiple steps. They appear in the Referenced Actions section at the top of the Actions sidebar.
When you insert a referenced action, a deep copy is placed in the step. You can then customize each copy independently.
Search the canvas
Click the search icon in the canvas toolbar to open the search bar. Type to filter steps by title, name, action type, or transition type.
| Key | Action |
|---|---|
| Enter | Select the highlighted result and center the canvas on it. |
| Arrow Down | Move to the next result. |
| Arrow Up | Move to the previous result. |
| Escape | Close the search bar. |
Save a flow
Click Update in the top toolbar or press Ctrl+S / Cmd+S to save. The Flow Builder validates the flow before saving and displays errors or warnings in the configuration panel.
Keyboard shortcuts
| Shortcut | Action |
|---|---|
| Ctrl+S / Cmd+S | Save the flow. |
| A | Open the JSON editor for the selected step, or the flow if no step is selected. |
| Ctrl+C / Cmd+C | Copy the selected step. |
| Ctrl+V / Cmd+V | Paste a copied step at the canvas center. |
| Ctrl+Z / Cmd+Z | Undo the last action. |
| Delete / Backspace | Delete the selected step or transition. |
Keyboard shortcuts are disabled while a text field is focused.
Validation
The Flow Builder validates your flow in real time. Checks include:
- Orphaned steps: No incoming or outgoing transitions.
- Missing actions: Referenced action no longer available.
- Invalid transitions: Target step does not exist.
- Self-referencing loops: Transitions that create infinite loops.
- Required fields: Action-specific required fields left empty.
Validation messages appear as badges on step nodes and as a banner in the configuration panel.
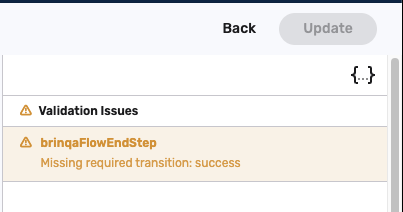
Troubleshoot the Flow Builder
- Flow fails to save: Check validation messages in the configuration panel. Resolve all errors before saving.
- Action not found in catalog: Verify the action is registered on the platform. Use the search bar in the Actions sidebar to search by name or type.
- View or edit raw JSON: Click the
{.}icon in the top-right corner to open the JSON editor for the entire flow, or click{.}in the step toolbar to edit a single step. - Check the Application Event Log: Go to Administration > System > Logs for detailed error information about flow execution failures.