Okta
Okta is an identity management tool that provides single sign-on across multiple applications. You can bring group, group member, and user data from Okta into Brinqa to construct a unified view of your attack surface and strengthen your cybersecurity posture.
This document details the information you must provide for the connector to authenticate with Okta and how to obtain that information from Okta. See create a data integration for step-by-step instructions on setting up the integration.
Required connection settings
When setting up a data integration, select Okta from the Connector dropdown. If you cannot find the connector in the dropdown, make sure that you have installed it first. You must provide the following information to authenticate Okta with Brinqa:
-
Okta URL: Your organization's Okta domain URL. The default URL format is
https://<organization_name>.okta.com/. -
Client ID and Private key: The Client ID and access key associated with the Okta account, which must have permissions to log in to the API server and return data.
Create an OIDC app
Before you can generate Okta API credentials, you must create an OIDC app (OpenID Connect) for Brinqa and grant the necessary permissions. To do so, follow these steps:
-
Login to your organization's Okta Administrator Console.
-
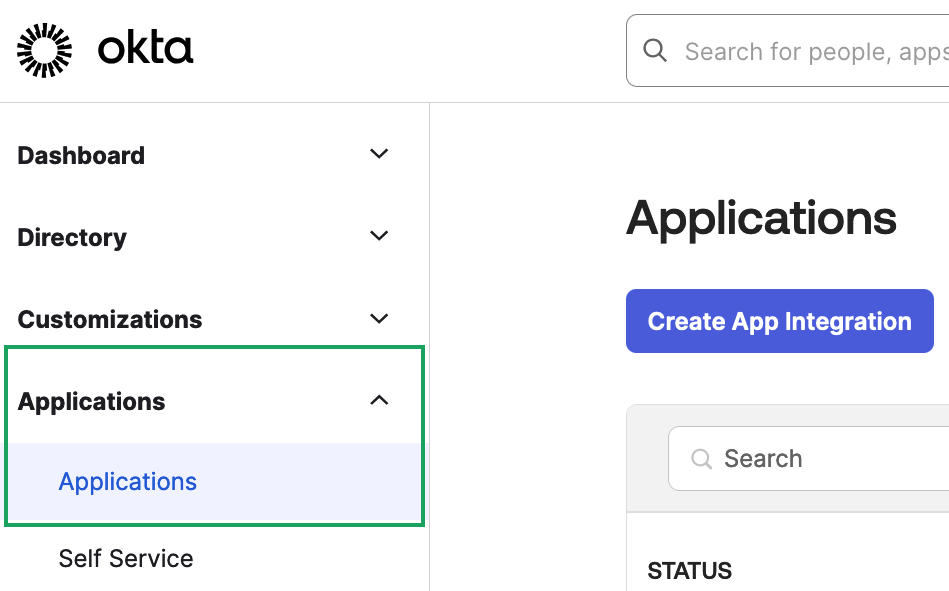
Navigate to Applications > Applications and click Create App Integration.

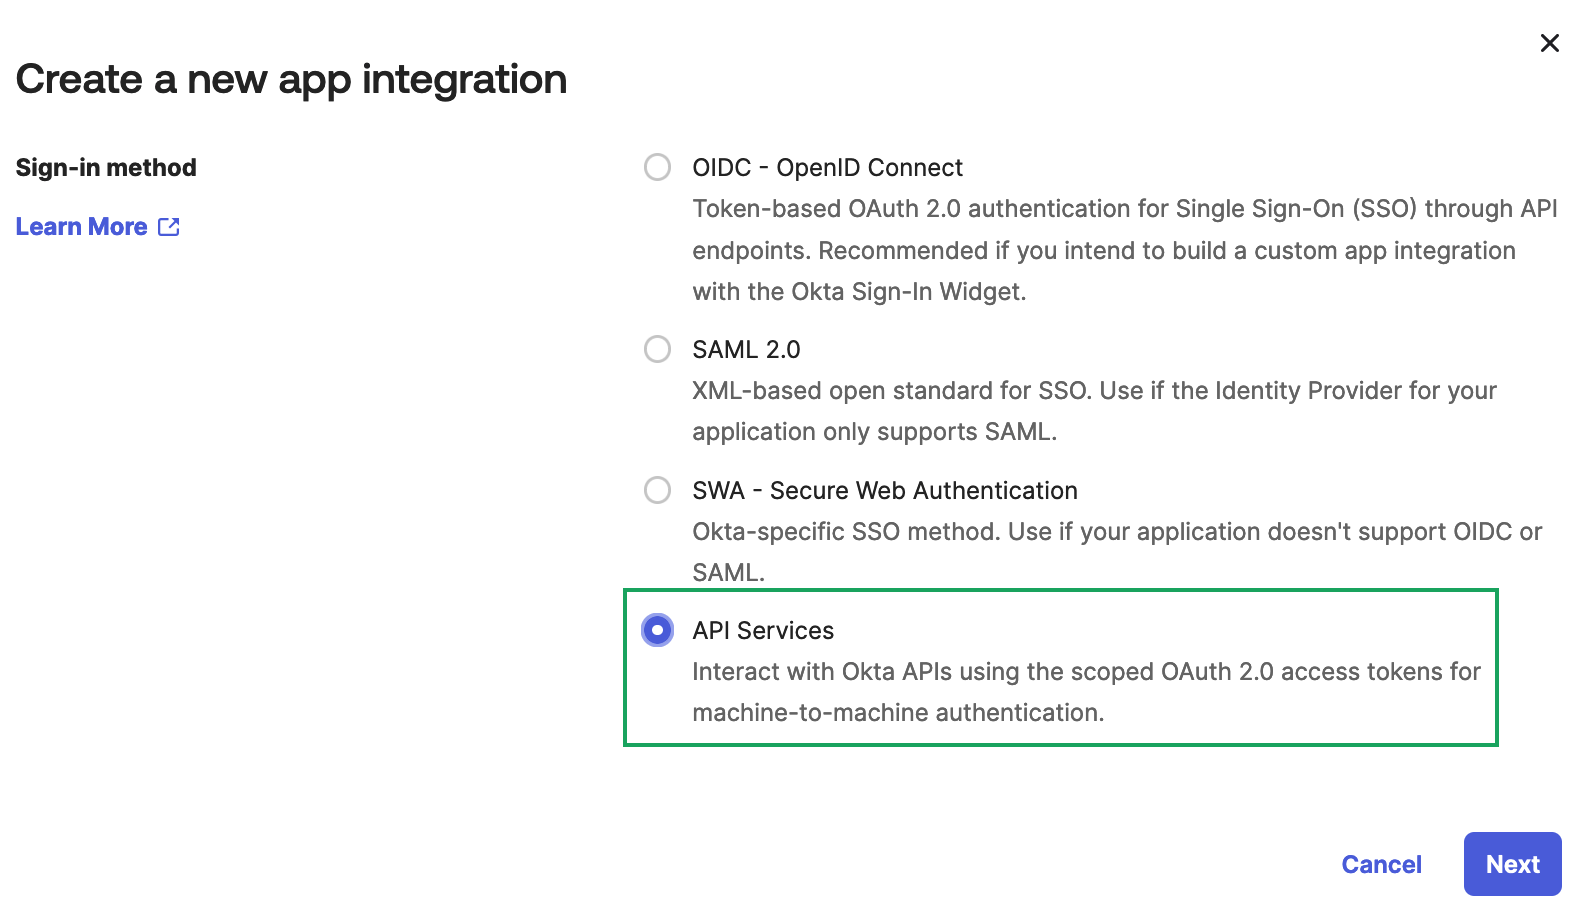
The "Create a new app integration" window appears.
-
Select API Services and then click Next.

-
Give the new API Services App integration a name and then click Save.
The page refreshes and the new application page displays.
-
Click the Okta API Scopes tab and grant access to the following scopes:
okta.apps.readokta.devices.readokta.domains.readokta.groups.readokta.roles.readokta.schemas.readokta.userTypes.readokta.users.read
If you do not have permissions to create an OIDC app, contact your Okta administrator. For additional information, see Okta documentation.
Generate Okta API credentials
Once you've created your OIDC app for Brinqa, you can now obtain your Okta API credentials. To do so, follow these steps:
-
While still on the application settings page of the OIDC app you have created for Brinqa, click the General tab.
-
The Client ID needed for authentication displays in the Client Credentials section.

-
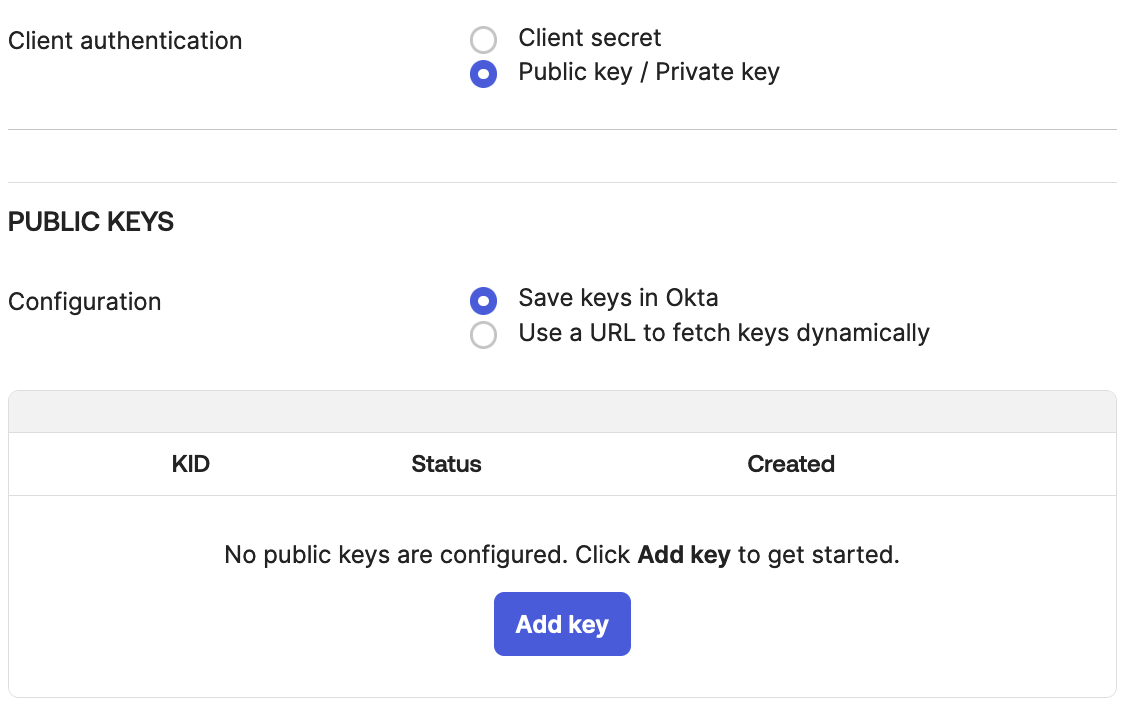
Click Edit, and in Client authentication, select Public key / Private key.

-
Click Add Key and then click Generate new key. This generates a public key and private key. You can download the private key as a JSON or PEM file. You can also copy it to your clipboard to save in a secure location.
-
Click Done.
If you do not have permissions to create an access key, contact your Okta administrator. For additional information, see Okta documentation.
Additional settings
The Okta connector contains additional options for specific configuration:
-
Page size: The maximum number of records to get per API request. The default setting is 100. It is not recommended to go over 100.
-
Maximum retries: The maximum number of times that the integration attempts to connect to the Okta API before giving up and reporting a failure. The default setting is 5.
Types of data to retrieve
The Okta connector can retrieve the following types of data from the Okta API:
Table 1: Data retrieved from Okta
| Connector Object | Required | Maps to Data Model |
|---|---|---|
| Group | Yes | Team |
| Group Member | No | Not mapped |
| User | Yes | Person |
The Okta connector does not currently support operation options for the types of data it retrieves.
For detailed steps on how to view the data retrieved from Okta in the Brinqa Platform, see How to view your data.
Attribute mappings
Expand the sections below to view the mappings between the source and the Brinqa data model attributes.
Group
Table 2: Group attribute mappings
| Source Field Name | Maps to Attribute |
|---|---|
| CREATED | sourceCreateDate |
| DESCRIPTION | description |
| GROUP_TYPE | Local variable |
| LAST_MEMBERSHIP_UPDATED | Local variable |
| LAST_UPDATED | sourceLastModified |
| NAME | name |
| OC | Local variable |
| SYS_ID | uid |
Local variable indicates that the field is processed within a specific context, such as a particular workflow or calculation. Unlike other attributes, local variables aren't mapped to the unified data models (UDM). They only exist on the source data model (SDM).
User
Table 3: User attribute mappings
| Source Field Name | Maps to Attribute |
|---|---|
| ACTIVATED | Local variable |
| CREATED | sourceCreatedDate |
| LAST_LOGIN | Local variable |
| LAST_UPDATED | sourceLastModified |
| PASSWORD_CHANGED | Local variable |
| STATUS | status |
| STATUS_CHANGED | Local variable |
| SYS_ID | uid |
Local variable indicates that the field is processed within a specific context, such as a particular workflow or calculation. Unlike other attributes, local variables aren't mapped to the unified data models (UDM). They only exist on the source data model (SDM).
APIs
The Okta connector uses the Okta API v1. Specifically, it uses the following endpoints:
Table 4: Okta API endpoints
| Connector Object | API Endpoint |
|---|---|
| Group | GET /api/v1/groups |
| Group Member | GET /api/v1/groups |
GET /api/v1/groups/{group_id}/users | |
| User | GET /api/v1/meta/types/user |
GET /api/v1/users |
Changelog
The Okta connector has undergone the following changes:
Table 5: Okta connector changelog
| Version | Description | Date Published |
|---|---|---|
| 3.0.1 | Added a new additional setting to help manage API throttling: Maximum retries | June 11th, 2025 |
| 3.0.0 | Initial Integration+ release. | December 18th, 2024 |