Import Your Data through Brinqa Connect
This tutorial guides you through the steps of importing data into the Brinqa Platform using Brinqa Connect.
Prerequisites
Before using Brinqa Connect, you must have these prerequisites in place:
-
A running instance of Brinqa Connect.
Cloud-based customers can access Brinqa Connect directly, whereas on-premises customers must download and install it first. After Brinqa Connect is configured, you can access it by entering
https://<brinqa-platform-url>/connect/into your web browser. Replace<brinqa-platform-url>with the URL to your Brinqa Platform. -
A Brinqa Connect user with the appropriate role assigned.
Brinqa Connect provides three different roles to protect your data: admin, egress, and ingress. For the purpose of this tutorial, you need a user with either the ADMIN or INGRESS role.
-
Brinqa Connect user credentials.
Brinqa Connect uses distinct credentials for authentication, separate from the Brinqa Platform credentials. To obtain your Brinqa Connect credentials, please contact Brinqa Support or the Brinqa team overseeing your deployment. Customers with on-premises installations can generate the credentials during the user creation process.
Import your data
Using Brinqa Connect, You can ingest your unstructured data into the Brinqa Platform with these steps:
- Authenticate with Brinqa Connect
- Push your data into Brinqa Connect
- Create an integration to import your data
- Add attribute mapping for your data
Authenticate with Brinqa Connect
Brinqa Connect supports the OpenAPI schema and user interface (UI) for a developer friendly experience. With support for OpenAPI, developers can generate a client in their desired language. The sandbox UI is available at the relative URL /connect, which provides a simple interface to try the API endpoints. Alternatively, you can interact with the endpoints using any API platform you prefer. For this tutorial, we'll use the Brinqa Connect sandbox.
Before using any of the Brinqa Connect API endpoints, you must provide authentication. To do so, follow these steps:
-
Enter
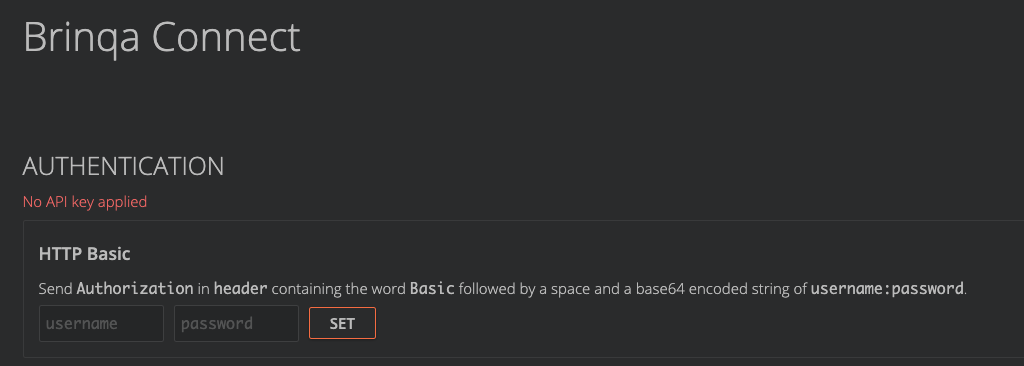
https://<brinqa-platform-url>/connect/into your web browser.If Brinqa Connect is running, the page displays the Brinqa Connect API with the Authentication setting:
-
Enter the username and password of the Brinqa Connect user gathered in prerequisites, and click SET.
-
After successful authentication, you can explore and test the API endpoints using the TRY buttons.
Push your data into Brinqa Connect
The Brinqa Connect API supports different endpoints for sending data, either synchronously or asynchronously. In this tutorial, we'll use the POST /api/v1/data/{name} endpoint. To do so, follow these steps:
-
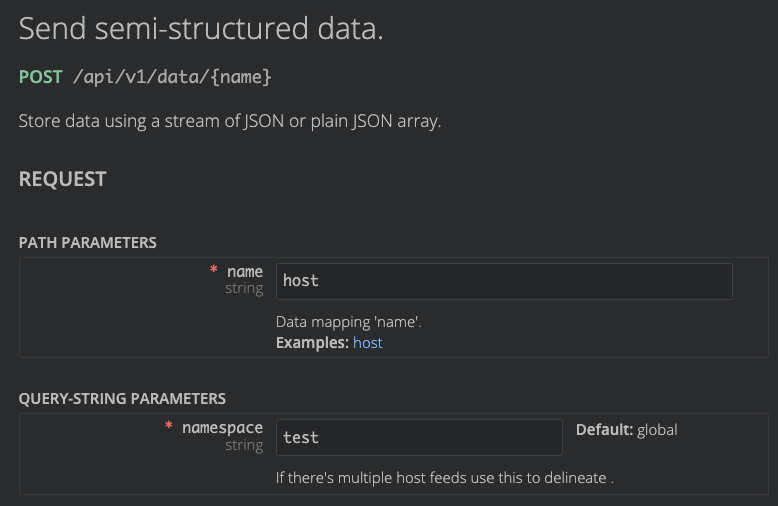
In the Brinqa Connect sandbox, click Send semi-structured data.
-
In the name field, type "host".
The 'name' parameter is a string that describes the nature of your data. In this case, we are going to create a host.
-
In the namespace field, type "test".
The 'namespace' parameter is a string that separates your data into groups. If not set, the default value is 'global'.
tipMake a note of these two parameters. You'll need to use them later when creating an integration.
-
In the EXAMPLE field, paste in this sample code and click TRY:
{"attributes": {"os": "Microsoft Windows 11 Enterprise Build 22000","display_name": "Sample Server for Brinqa Connect","date_created": "2024-01-01 20:30:00","hostname": "sampleServer","fqdn": "sampleServer.myDomain.com","tags": ["Windows","Server"],"external": false,"status": "Online"}}This request creates a Windows Server host with attributes such as
display_name,fqdn,hostname, andtags. -
Brinqa Connect creates the record and sends the following response:
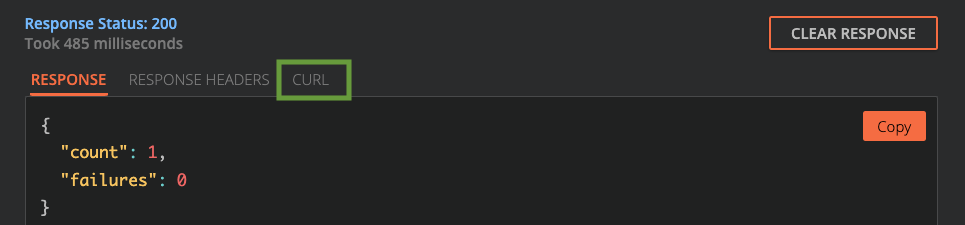
If needed, you can click the CURL tab and copy the command to use elsewhere.
Define date formats
When your data contain Date attributes, it's crucial to define their formats. Otherwise, they are treated as String attributes. For example, the "date_created": "2024-01-01 20:30:00" attribute from the previous code snippet requires a date format definition. The endpoint to use in this context is POST /api/v1/config.
To define a Date format, follow these steps:
-
Click Create type definition.
-
In the EXAMPLE field, paste in this sample code and click TRY.
Please pay attention to the
dateFieldConfigsection, where you can specify type, formats, and timezones for each Date attribute.You can use
titleto designate a friendly name for representing your data in the Brinqa UI.{"id": {"namespace": "test","name": "host"},"title": "Host","description": "This configuration is for the test host in the Brinqa Connect import tutorial.","uidFields": ["fqdn"],"dateFieldConfig": {"date_created": {"type": "DATE_TIME","formats": ["yyyy-MM-dd HH:mm:ss"],"timezones": ["UTC"]}}} -
You should receive a
Response Status: 201with no message.
Define attribute types
In addition to date formats, you can specify data types for your attributes to ensure they are properly interpreted by the Brinqa Platform. This is particularly important for numeric values, boolean flags, and multi-valued attributes.
To define attribute types, follow these steps:
-
Click Create type definition.
-
In the EXAMPLE field, paste in this sample code and click TRY.
{// Required"id": {"namespace": "test","name": "Site"},// Optional"expiresIn": 31536000,"uidFields": ["id"],"attributeFeatures": {"profileUids": ["MultiValue"]},"attributeType": {"id": "int","status": "string","percentageImpacted": "double","digitalPropertyOwner": "string","isHighPriority": "boolean","containerUid": "string","subtype": "string","url": "string","profileUids": "string"}}Key configuration options:
-
id: (Required) Specifies the namespace and name for your data type. -
expiresIn: Sets the data expiration time in seconds. -
uidFields: Lists fields used to generate unique identifiers. The values from these fields are combined and hashed to create a unique ID. These fields must also appear inattributeType. -
attributeFeatures: Defines special features for attributes.Use
MultiValuefor array-type attributes. When an attribute is multi-valued, all values in the list must be of the same data type (e.g., all strings or all booleans, not mixed). -
attributeType: Specifies the data type for each attribute (e.g., int, string, double, boolean).
-
-
You should receive a
Response Status: 201with no message.
For best results, create type definitions before sending data. You can also update them later if your data structure changes.
Create an integration to import your data
After successfully ingesting data into Brinqa Connect, the next step is to bring that data into the Brinqa Platform, which you can achieve by creating a data integration with the Brinqa Connect connector. To do so, follow these steps:
-
Log in to your Brinqa Platform as a system administrator.
-
Navigate to Integrations > Sources and click Create.
-
Fill out the general information:
-
Title: Enter a title for this integration, e.g.: "My data through Brinqa Connect".
-
Connector: Select Brinqa Connect from the dropdown.
-
Server: Keep as is, which is 'Local Server'.
infoIn Brinqa Platform version 12, a Version field appears between Connector and Server, allowing you to select the connector version. Additionally, the default server is named Cloud Server instead of Local Server.
-
Description: If desired, provide a description for the integration.
-
-
Complete the required connection settings:
-
Connect URL: Enter the URL for your Brinqa Connect installation, e.g.:
https://<your-brinqa-platform-url>/connect/. -
Username and Password: Enter the credentials of the Brinqa Connect user gathered in prerequisites.
-
Page size: Keep as is, which gets up to 1000 records per API request.
-
Namespace: Enter the 'namespace' parameter specified when pushing data into Brinqa Connect. In this case, enter "test".
-
-
Click Next to test the connection and save the configuration.
The connector tries to access the Brinqa Connect API. If the connection is successful, more options display.
-
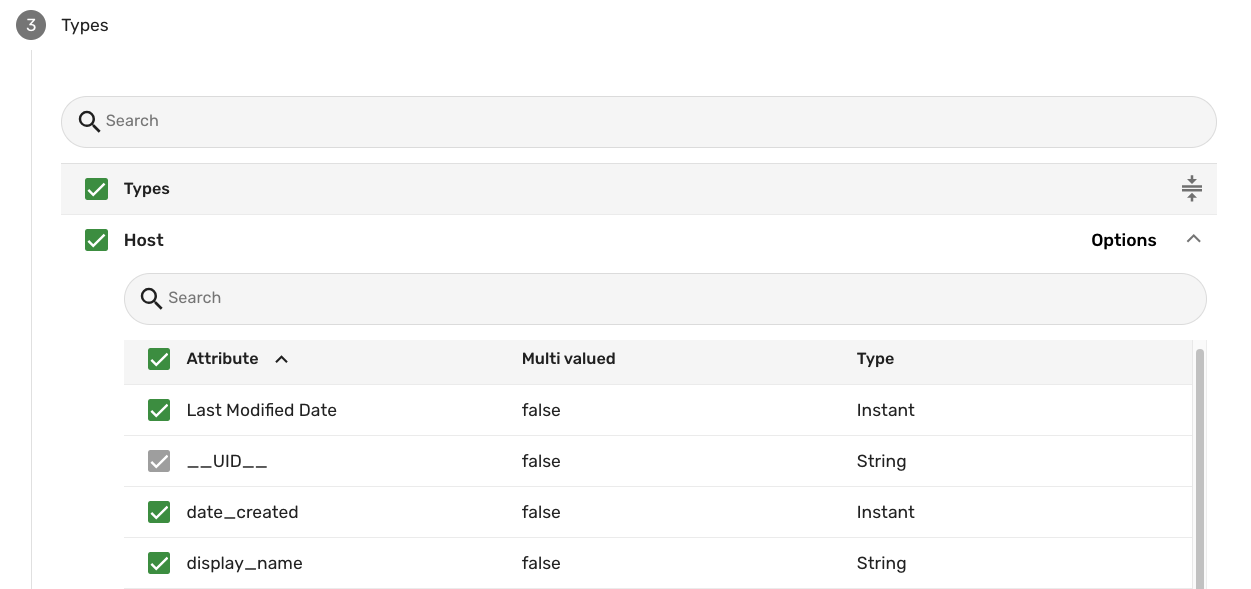
In Types, the title that you specify when pushing data into Brinqa Connect is listed. Click the checkbox next to 'Host' to select it, which selects all the attributes for import.
-
Keep the remaining settings as they are and click Create.
The page reloads and you should see your integration listed. If you do not see it, use Search to locate it.
-
Click the title of your integration to open its details. Click Sync to manually start the data integration.
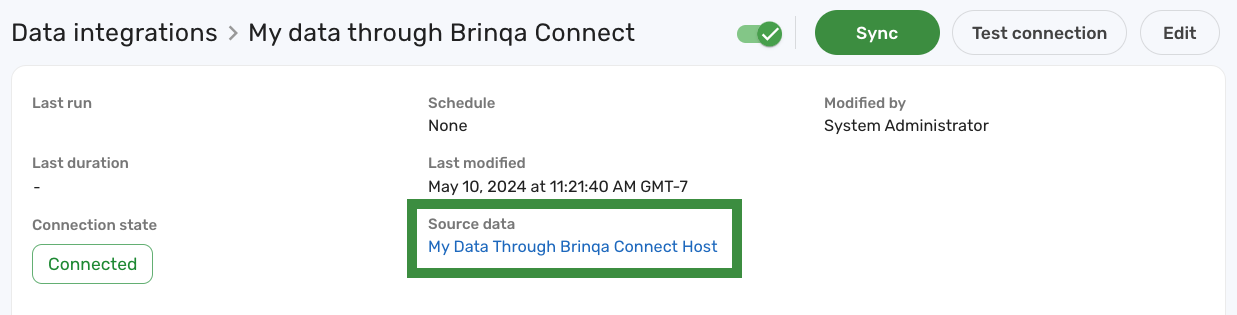
Copy the value of Source data for usage in the next step. Observe that it consists of the title of your integration followed by the type you've selected.
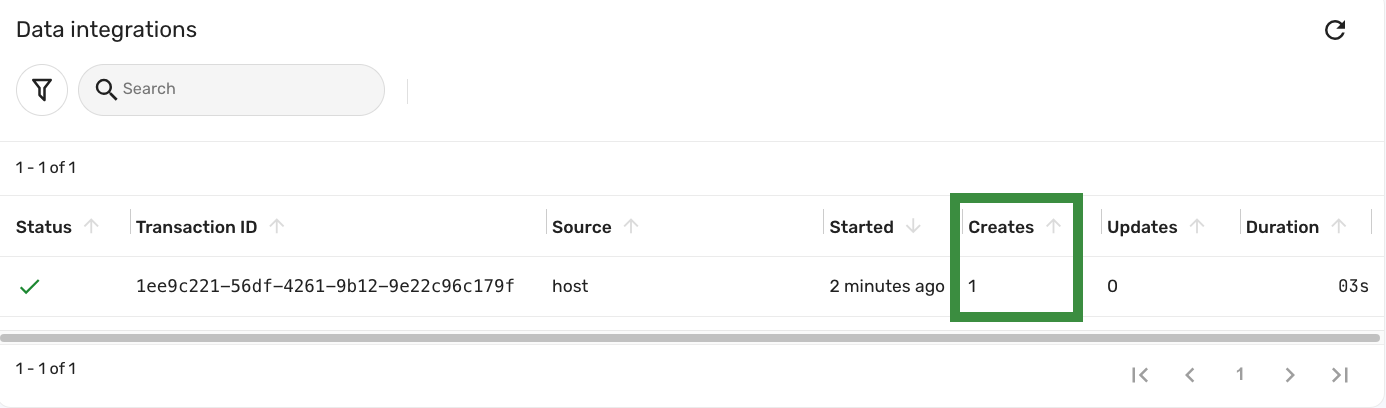
-
After the sync has completed, a log entry displays showing the number of imported records.
Add attribute mapping for your data
Unlike the other Integration+ connectors, the Brinqa Connect connector doesn't know how to map your unstructured data to Brinqa's unified data models (UDM). Therefore, you must specify the mappings yourself. To do so, follow these steps:
-
Navigate to Administration
 > Data > Models.
 -
Navigate to the data model to which you want to map your data. For this tutorial, search for Host and click it.
-
Click Consolidation.
-
Click the Sources field and type the initial characters of the source data name from the previous step, that is "My Data Through Brinqa Connect host". Select the full name as it appears.
tipThe name is case-sensitive.
-
Go to the Identifiers section and select an identifier for your data. An identifier is a piece of information that uniquely identifies your data. See data consolidation for more information.
-
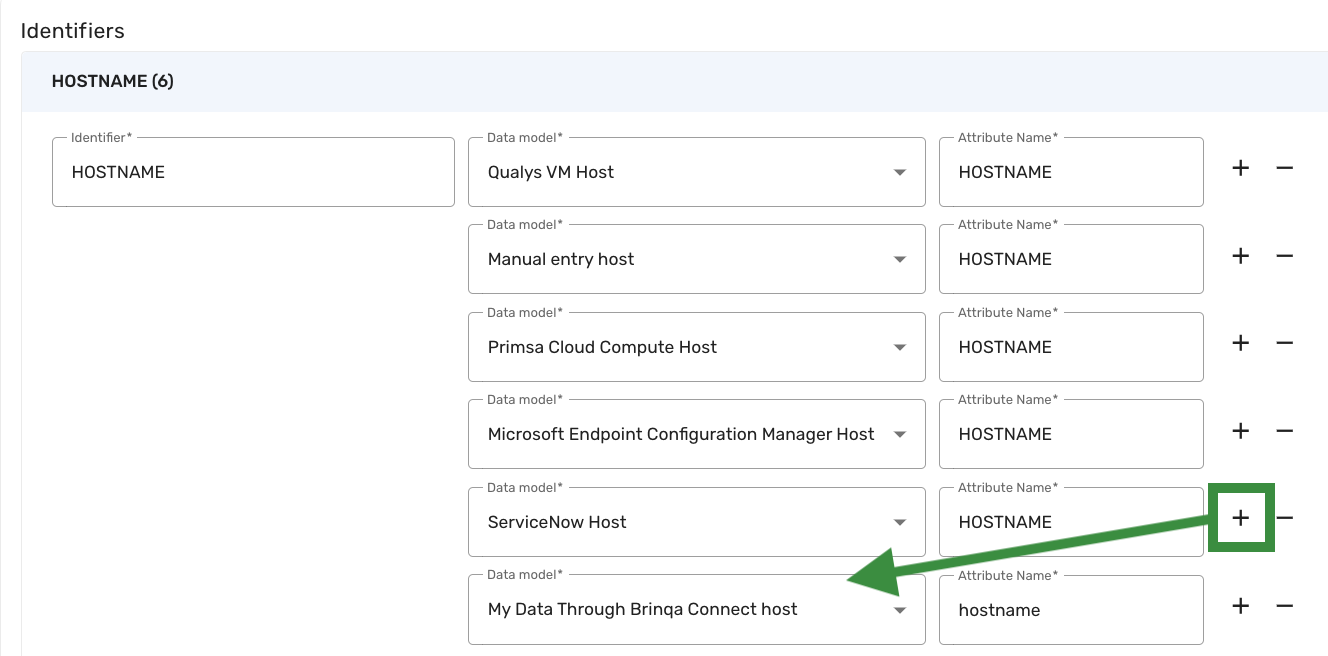
Click HOSTNAME, and then click the + sign at the last row.
-
In the new row, click Data model and type "My". Click the full name to select it.
-
Click Attribute Name and type "hostname". Click it to select the attribute.
tipAttribute Name refers to the attributes you specify when pushing data into Brinqa Connect. These attributes are case-sensitive.
-
-
Go to the Attribute mappings section to add your mappings.
-
Click DNS names, and then click the + sign at the last row.
A new row is added with the Data model field set to your source data name.
-
Click Source attribute and type "fqdn". Click it to select the attribute.
tipSource attributes are the attributes you specify when pushing data into Brinqa Connect. The attributes are case-sensitive.
-
Repeat the steps to add more mappings. For this tutorial, add the following mappings:
- Hostnames ~ hostname
- First seen ~ date_created
- Name ~ display_name
- Operating system ~ os
- Tags ~ tags
-
Go to the bottom of the page and click Update.
-
-
You can wait for the daily orchestration to process your data, or run a sub-flow to see the result right away. For the latter, click Flows in the left menu.
-
Click Host consolidation flow, click Launch, and then click Launch again.
This process runs data consolidation and incorporates your data with the Host UDM.
-
After the flow has completed, navigate to Inventory > Assets > Hosts.
-
Search for your data using the name or any of the attributes that you've mapped. In this case, type 'Sample' in the Search field and press Enter.
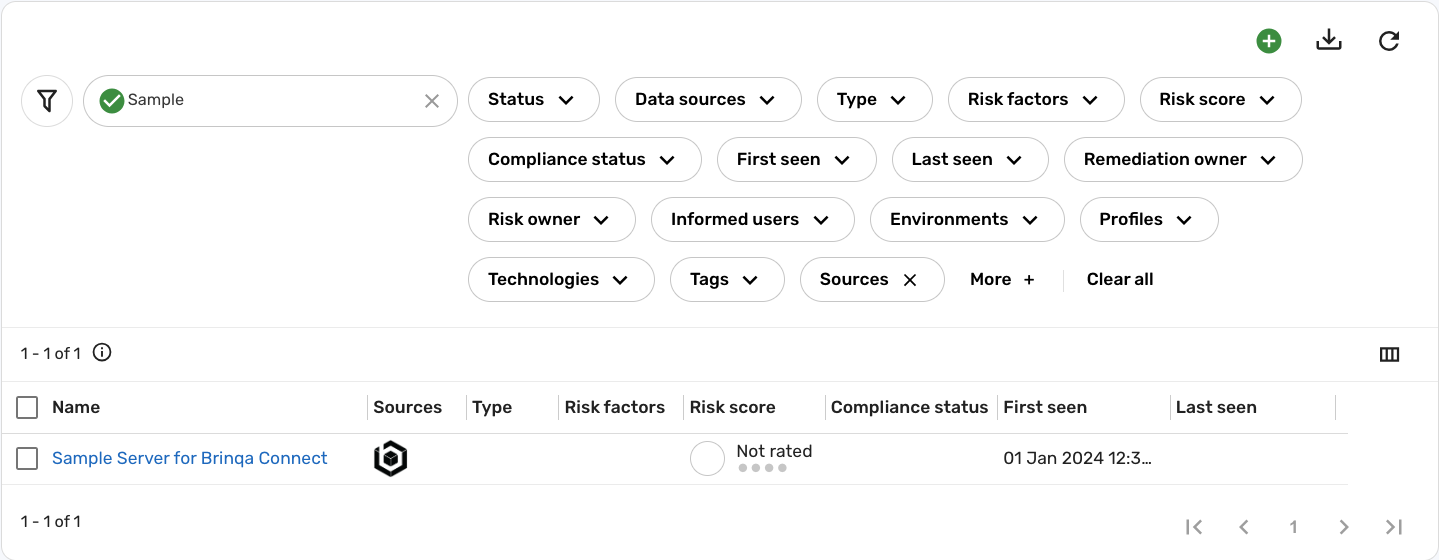
Click the name to verify the details of your host.